A shed, a hot tub, and a whole new backyard zone
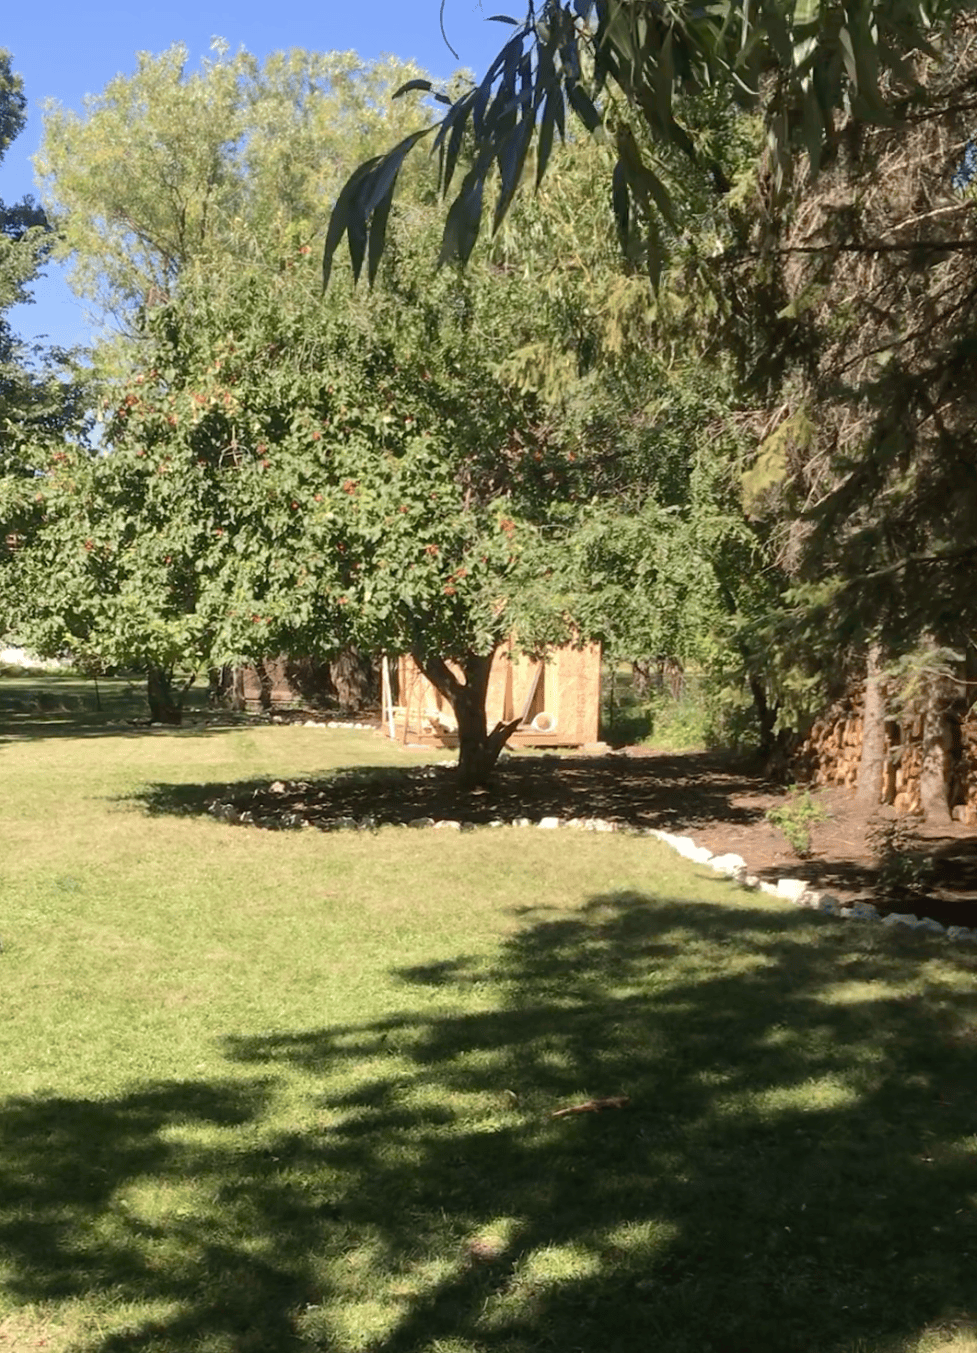
Our yard is big and has some beautiful mature trees—but we didn’t really notice just how nice the space was until I cleared out the overgrowth and weeds around the perimeter and added a border using rubble from the old patio. Once things were cleaned up and our new loose material patio was in place, we shifted our attention to the very back of the yard. It turned out to be a lovely, shaded spot—but we never actually spent time there. Then my husband’s parents offered him the wood he’d used to build a giant fort as a teenager, and we decided it would be the perfect place for a more grown-up version. What started as a rough plan for a simple backyard structure quickly turned into a finished shed, a hot tub area, and one of our favorite places to hang out.
The Purpose of Our Shed
This shed actually started out as a fort for my daughter, so the original plan was pretty simple—just a basic little structure tucked into the back of the yard. My husband decided to make it as large as possible without needing a permit and, like his original childhood fort, gave it higher ceilings to make the space feel more open.
That said… it took forever to finish. Over the span of a few years, my daughter aged out of wanting a playhouse, and then we were offered a free hot tub. That’s when the plan shifted. We started looking for a spot to place the hot tub and realized this “fort” could become a cozy hot tub hut instead.
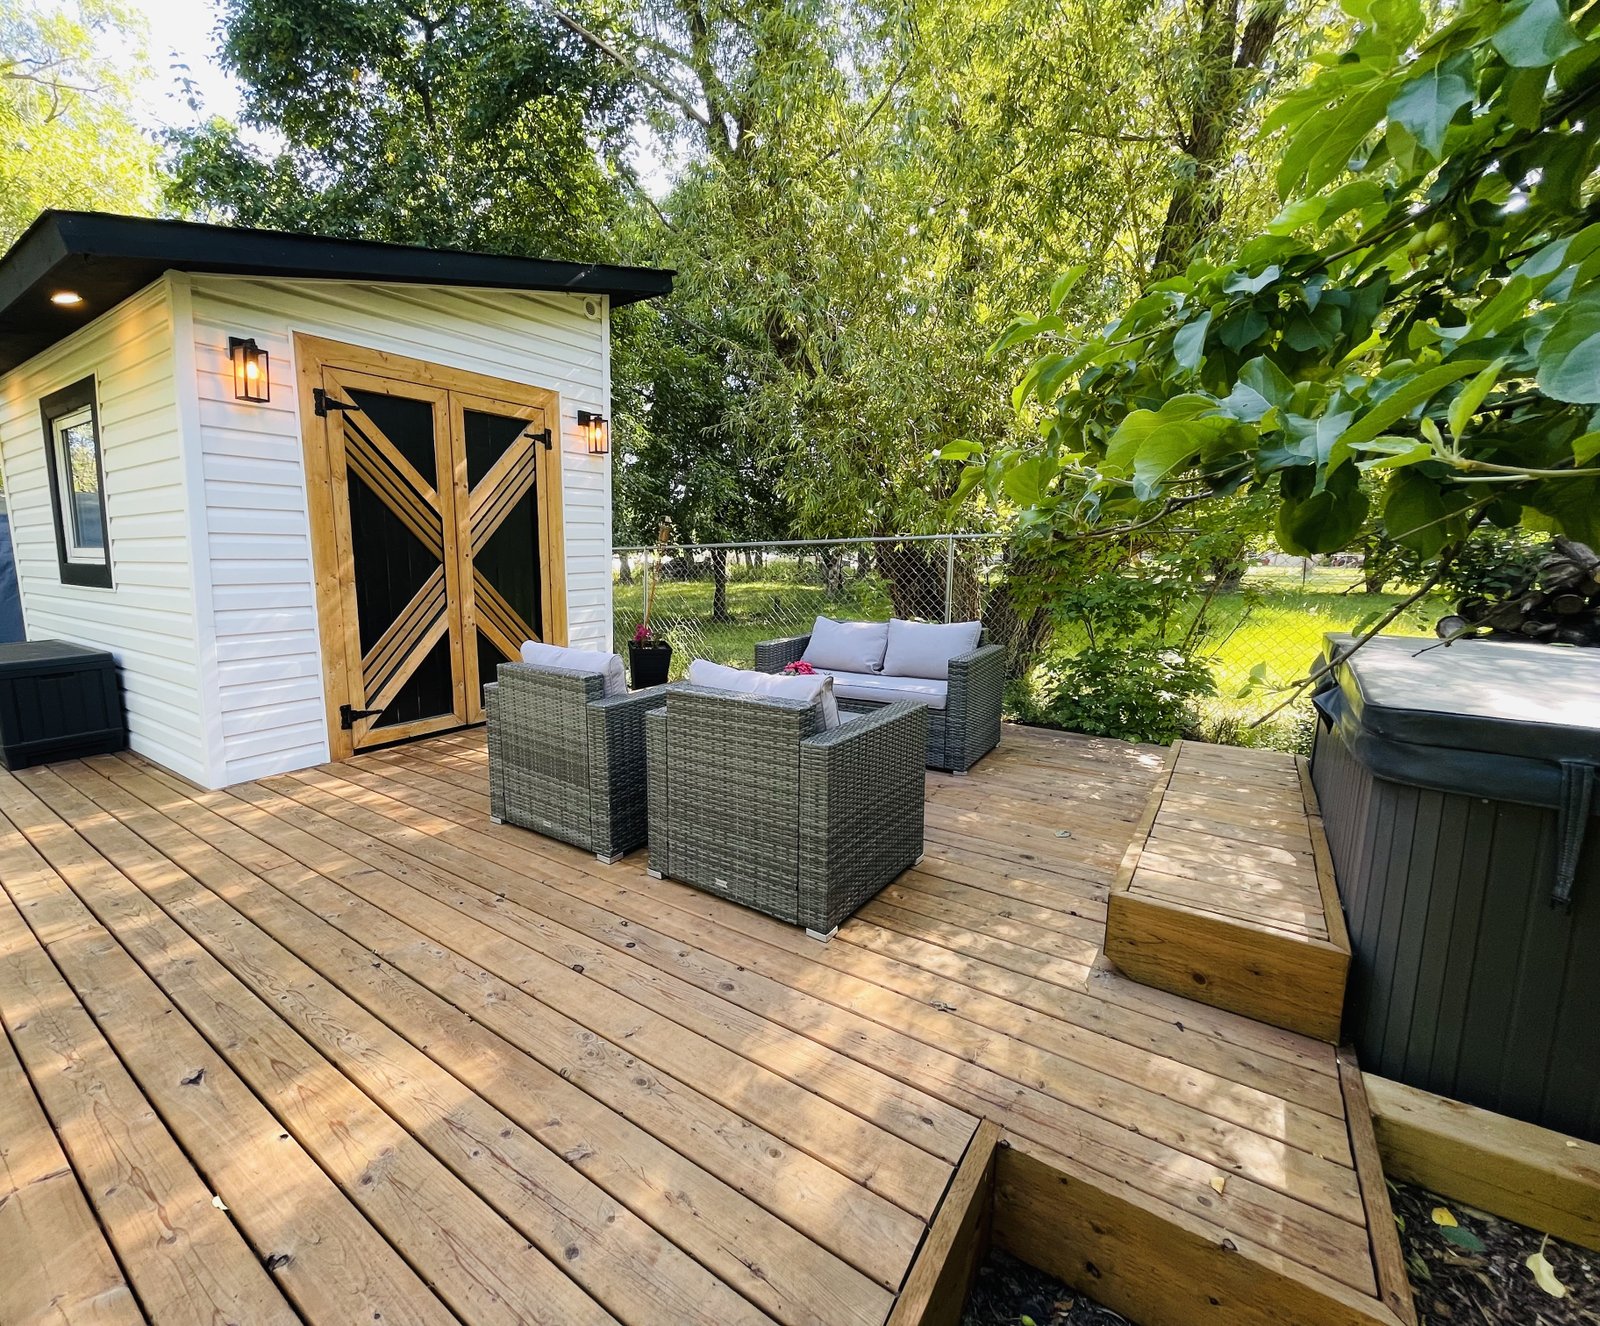
We only use the hot tub in the winter, and I’ve always loved the apple tree at the back of our yard—especially when its branches are heavy with snow. Since the tree isn’t directly beside the shed, we decided to build a deck that connected the two. Once the shed was built and the exterior finished, we placed the hot tub under the tree’s canopy and extended the deck to wrap around the front, with enough space for outdoor furniture too.
Our first winter with the hot tub was a bit rough—we had a cold, unfinished shed with no electricity or heat. We'd run out to the shed, toss our towels on whatever clean spot we could find, and then dash to the tub. But honestly, using it like that made me appreciate it even more now that it's fully finished and functional.
Our DIY Shed Build
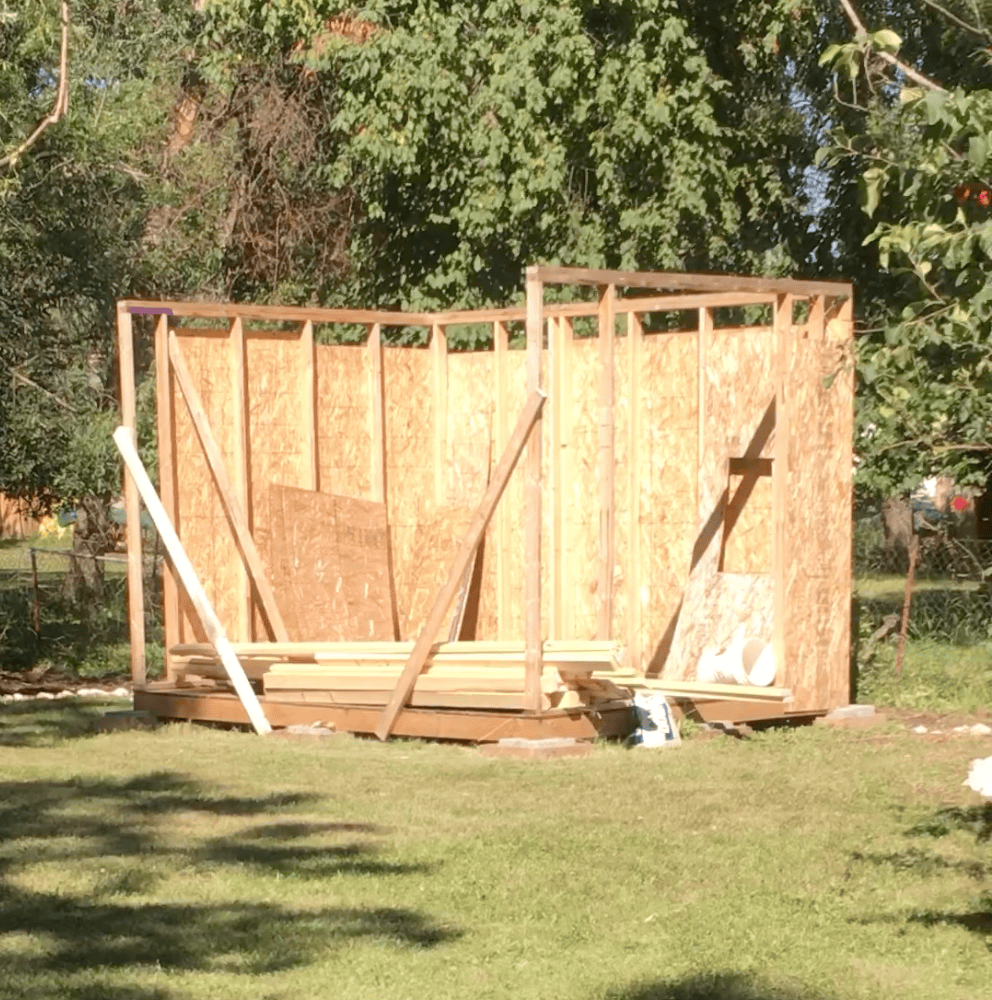
I won’t pretend to know every step of how this was built—but essentially, it was like building a tiny house (minus plumbing and HVAC). My husband started by leveling the ground with gravel, then built a foundation using lumber on concrete blocks. From there it was standard 2x4 framing, plywood sheathing to close in the exterior, shingles on the roof, electrical, insulation, drywall, flooring, and paint—plus all the interior finishing touches.
Designing the Shed Interior: Storage, Style & Function
After using the hot tub for a full winter with an unfinished shed, we knew what really mattered: heat, somewhere to put towels, robes, and snow-covered boots, and a bit of closed storage for hot tub chemicals and frequently used tools and gardening supplies. Since a lot of our “date nights” are just hot tub nights, we also wanted to add flexible lighting to make it feel cozy in the evenings.
My husband solved the heating issue by installing an electric wall heater—and radiant heated floors. Our house doesn’t even have heated floors! The floors can be turned on via Wi-Fi, but the heater needs to be switched on manually, so if we’re planning to use the hot tub, someone heads out about an hour in advance to turn on the heat and exterior lights.
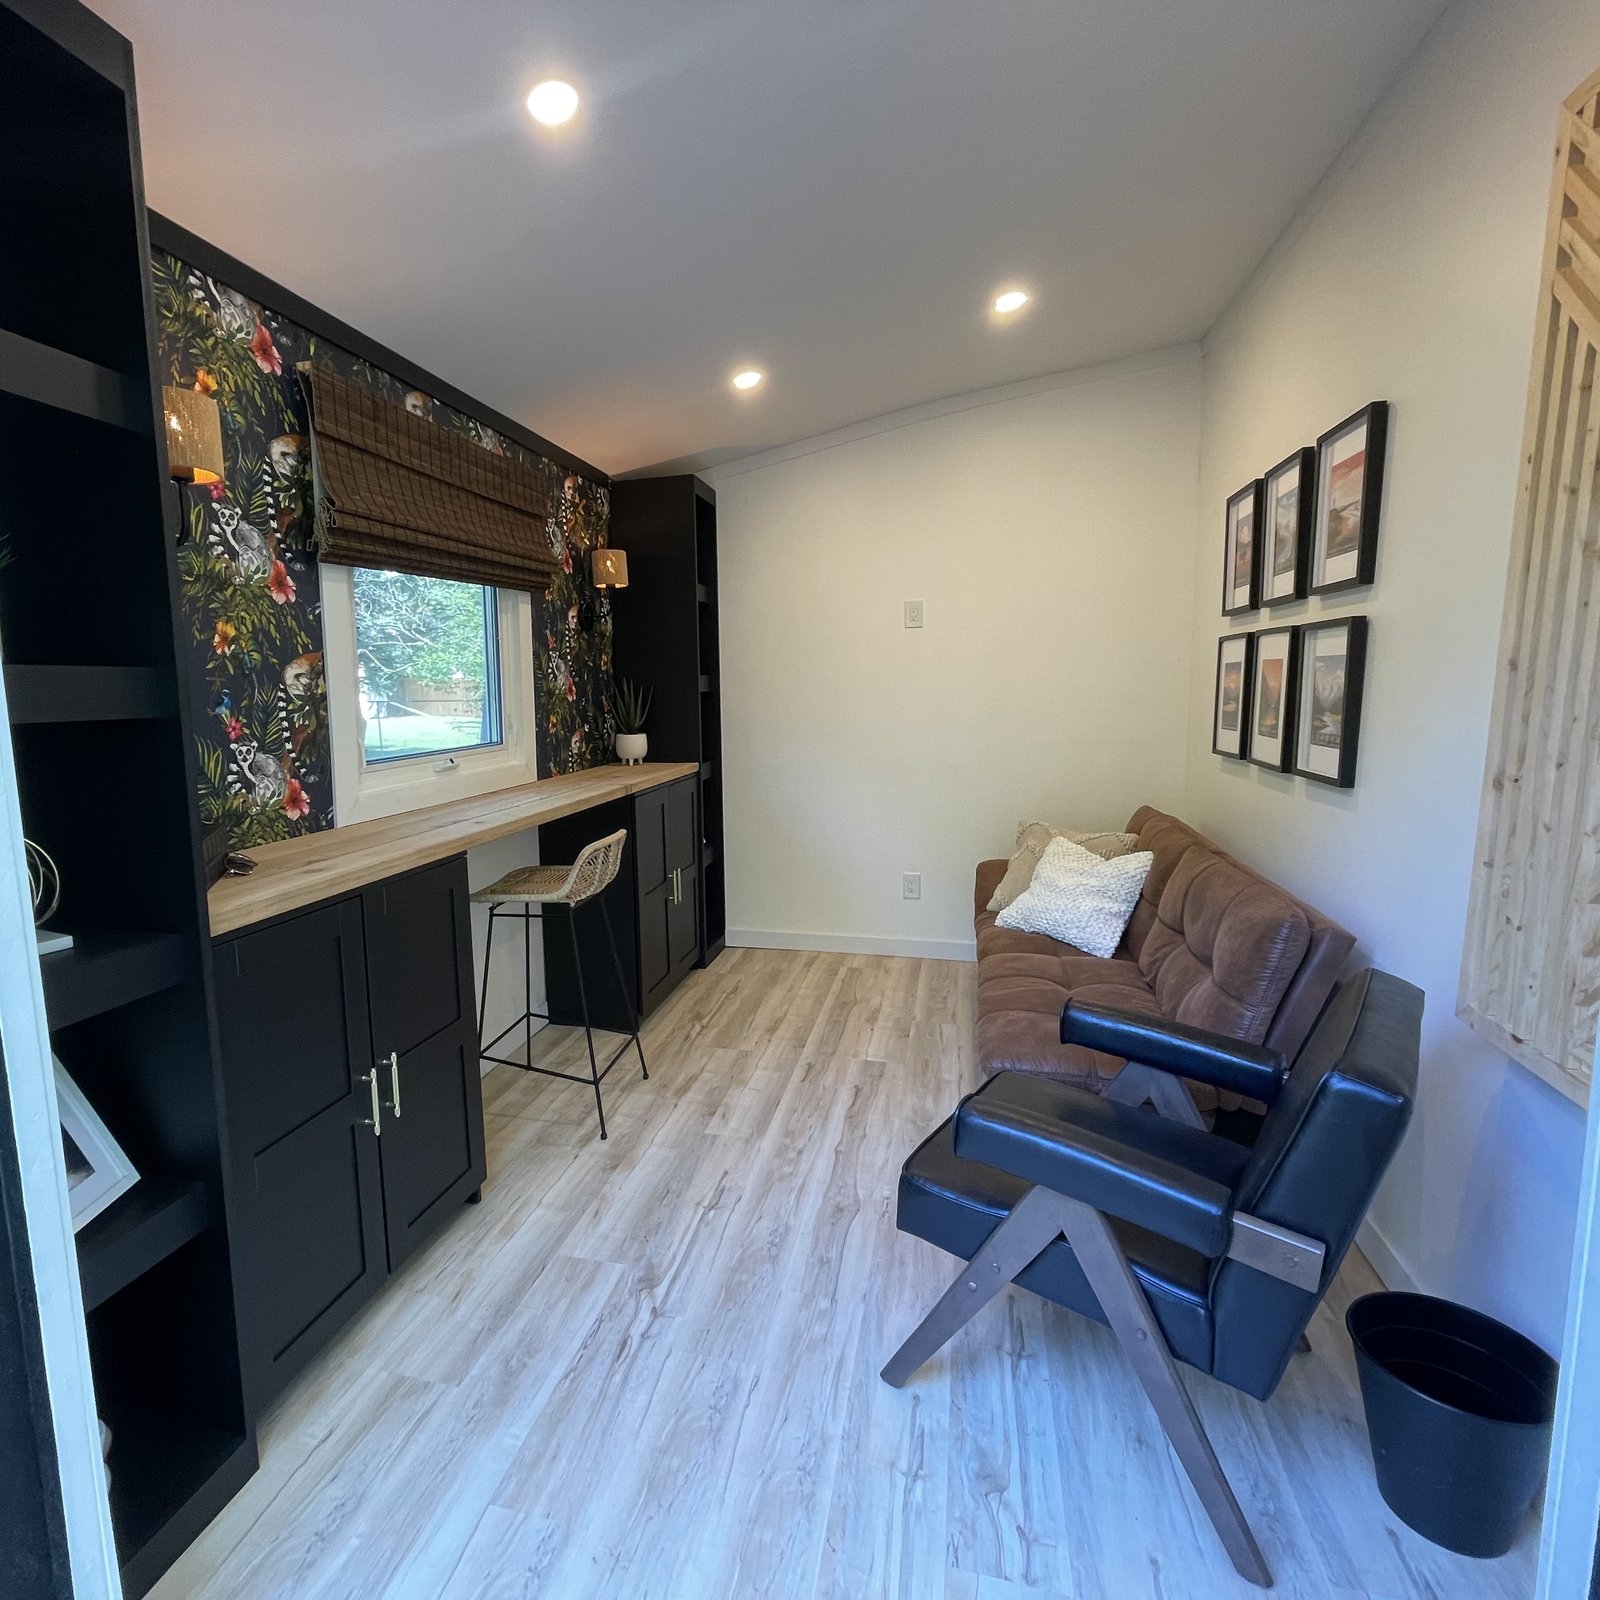
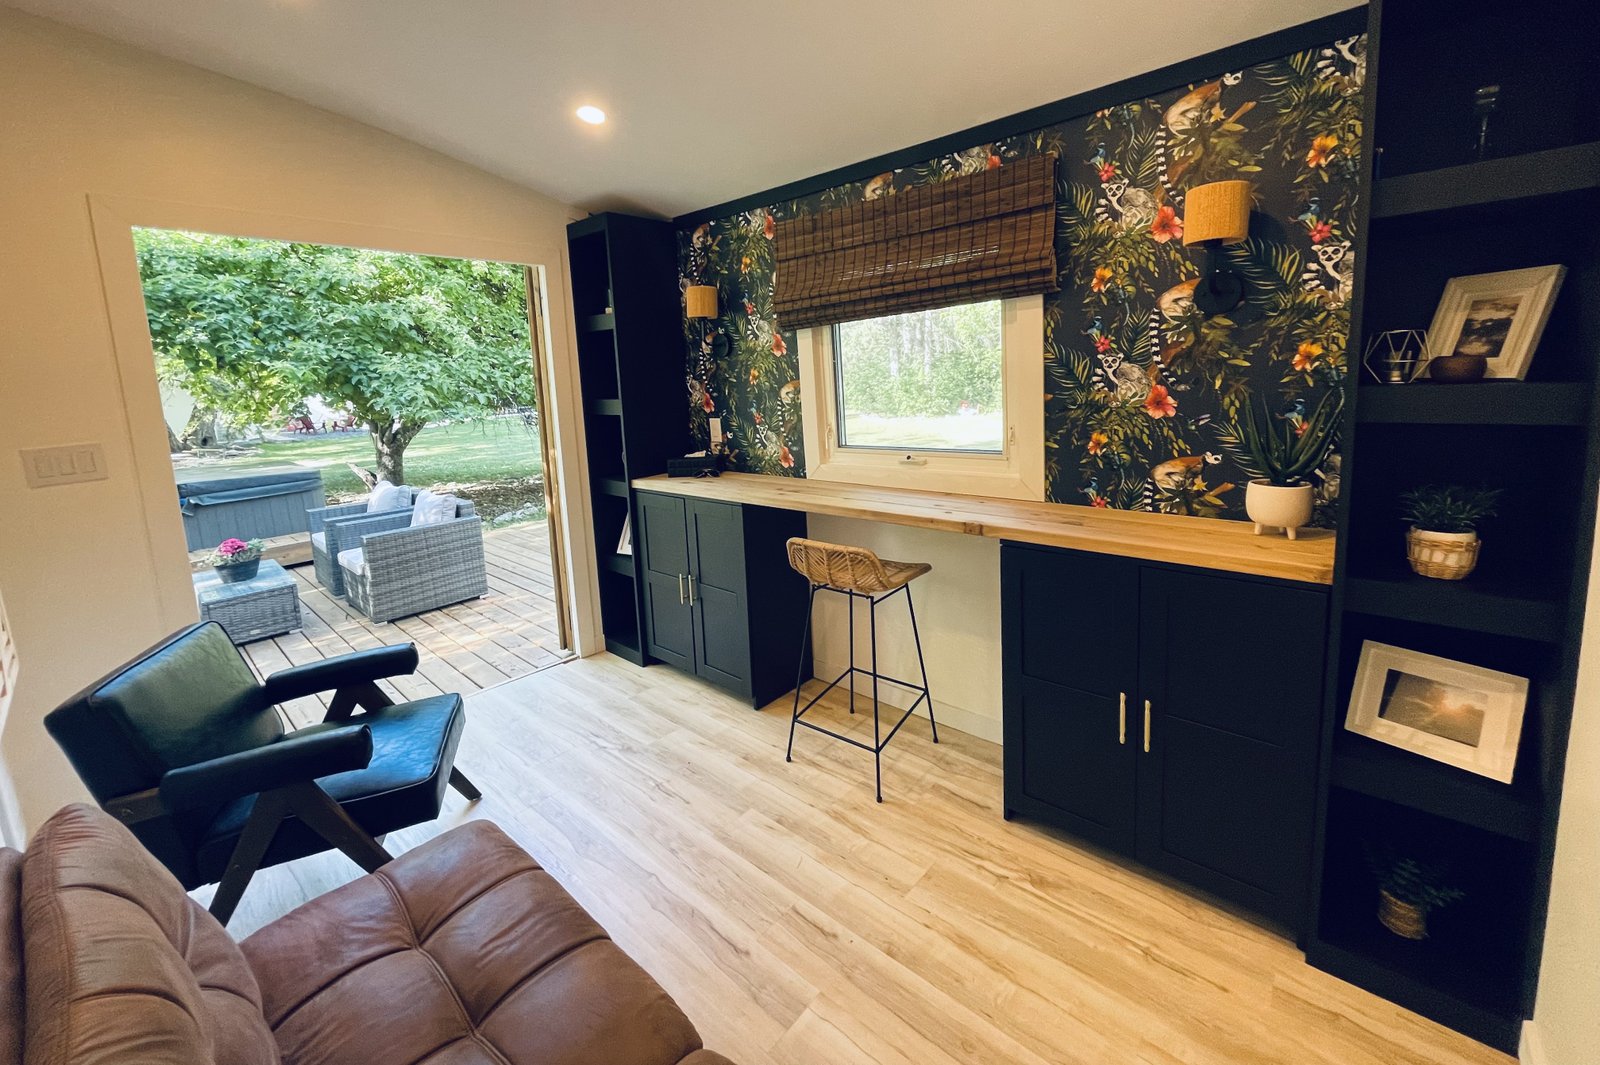
Since the shed is a standalone space, I didn’t need to worry about matching the rest of the house. I wanted to have fun with the design and go a little bolder than I normally would in, say, the living room. A full wall of storage was an option, but I didn’t want the space to feel closed in—and we had to work around the centered window. I landed on a mix of black built-ins and open shelves, a wood desktop, bold wallpaper, and cute dimmable wall sconces. It gave us the function we needed with the storage while also adding some serious wow factor when you open the door.
I have a full post on how we built the wall of storage and the desk here.
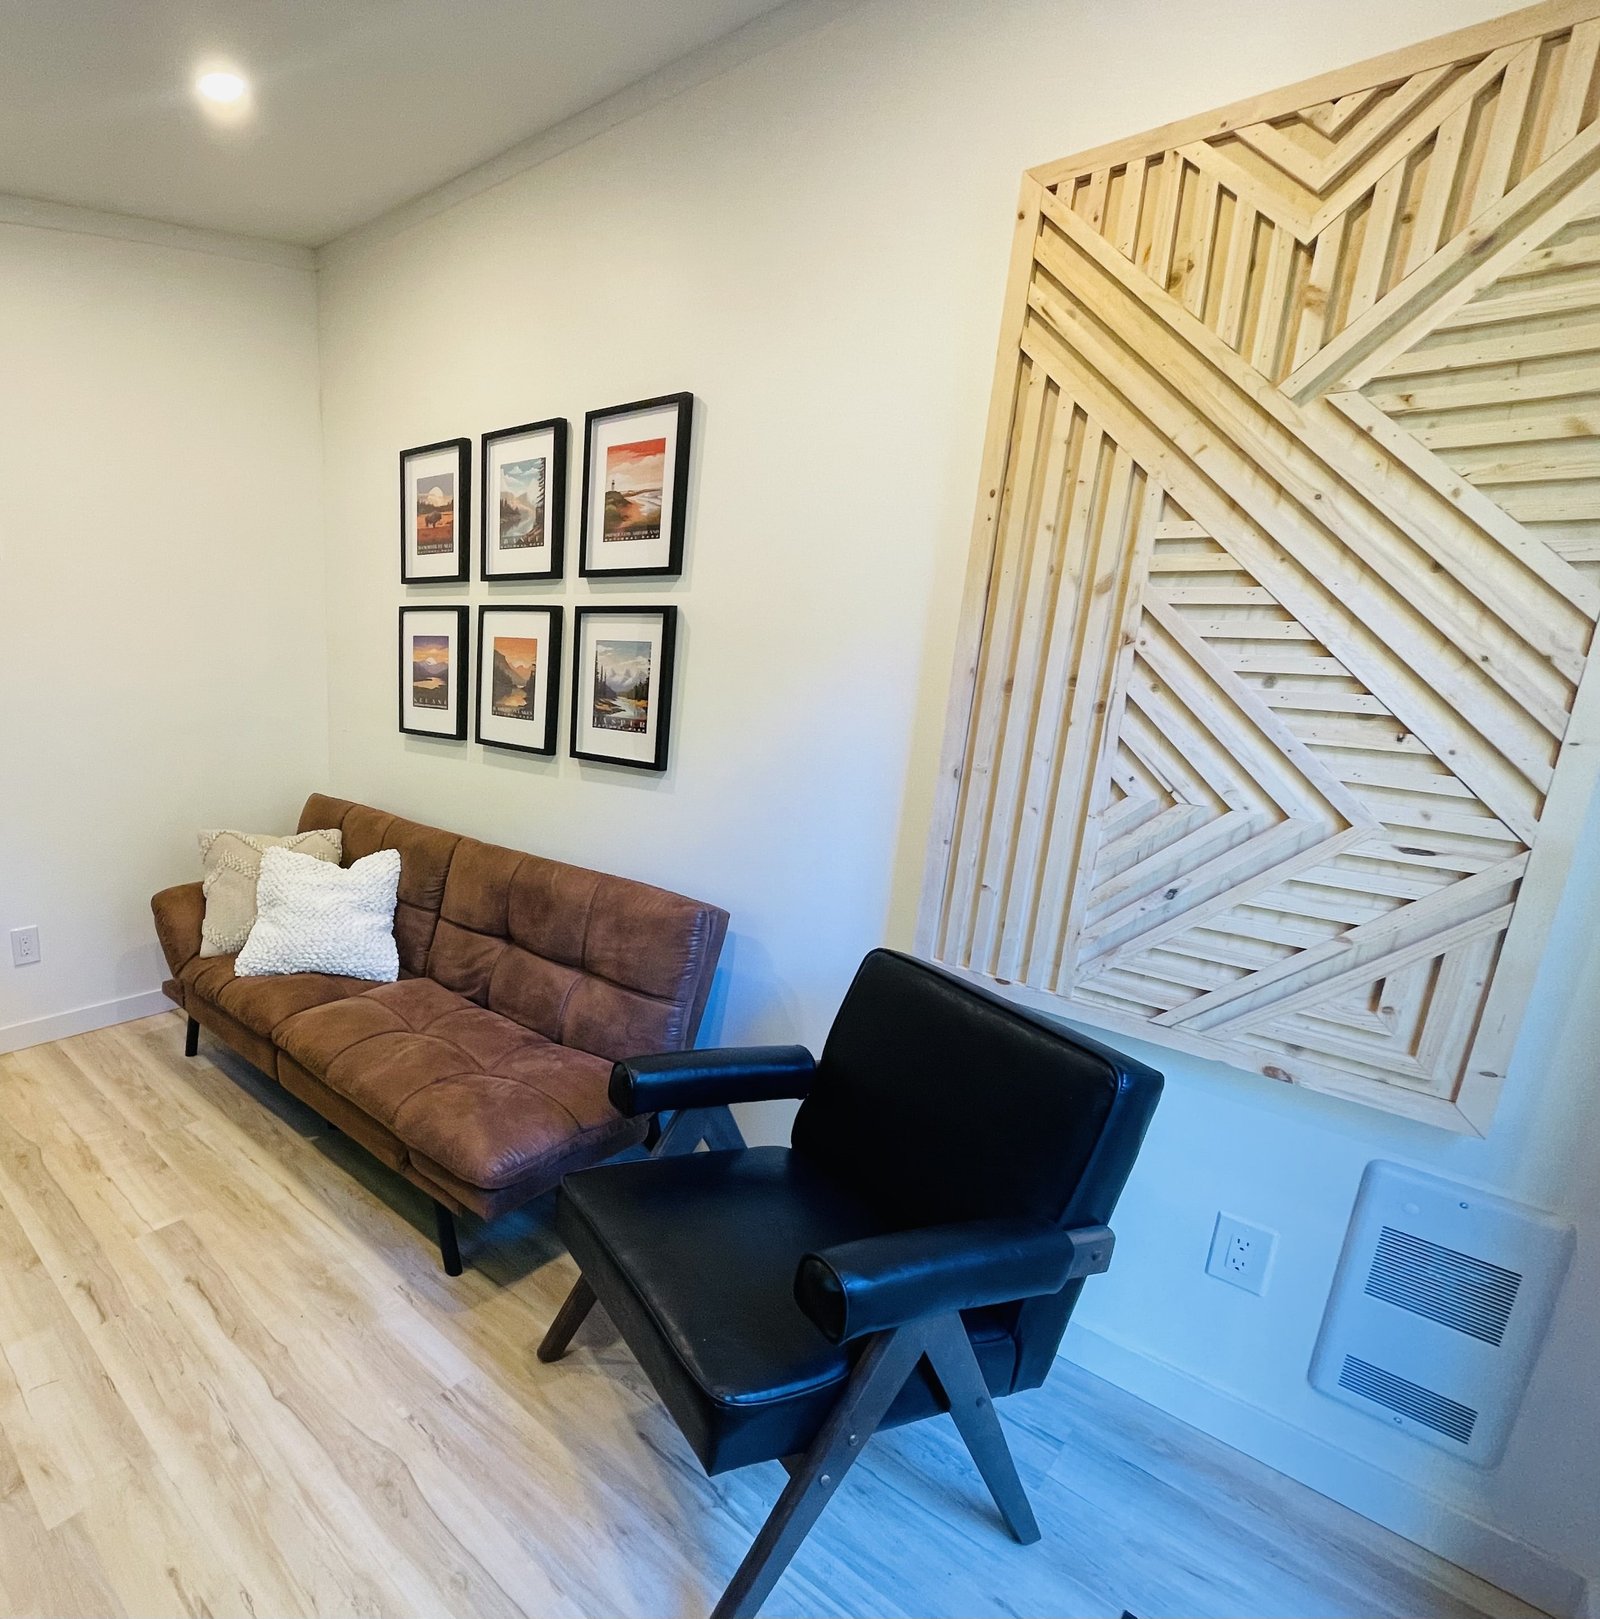
Because it’s such a small space, I kept the rest of the interior light and neutral to balance out the bold feature wall—warm white walls and light-toned LVP flooring, which gives it a bit of a beachy vibe. We chose furniture that’s water-resistant, easy to clean, and comfortable. The couch folds out into a bed in case we need an extra sleeping spot or just want to sneak off for a quiet afternoon nap. The desk chair looks great and is perfect for tossing towels over—but it is absolutely *not* comfortable to sit in for long.

Design Challenges
One of the biggest design challenges was figuring out how to deal with the big, ugly electrical panel above the heater. I considered covering it with artwork, but I really wanted to try something more unique—like geometric wood art. I found a design I liked, we settled on the size, and my husband built the piece and mounted it on hinges. It hides the panel completely but still allows easy access when we need it.
Another challenge was tying the indoor and outdoor spaces together. The wraparound deck connecting the shed and the hot tub helped unify everything, and adding a small seating area in between created a natural flow—making it feel like one large hangout zone instead of separate elements. We originally built oversized shed doors thinking we might use the space for storage, but now they just make the interior feel more connected to the deck and hot tub area. When the doors are open, it all feels like one space.
Final Thoughts...
Turning an unused corner of our yard into a finished shed and hot tub area wasn't something we planned all at once—but now it’s one of the best parts of our home. Whether we’re working out there, soaking in the tub, or just enjoying the view from the deck, it’s a space that keeps evolving and proving how much value you can get from salvaged materials, a bit of vision, and a lot of DIY..
The Budget
We didn’t start with a set budget—like most of our projects, we just aimed to get the best-looking result for the lowest cost. A lot of the sheathing wood was free, which helped. Here’s what we spent:
- Foundation: $200
- Framing lumber: $250
- Shingles & roofing materials: $250
- Insulation & drywall: $700
- Window (Marketplace find): $20
- Vinyl siding: $500
- Electrical, light fixtures & heater: $300
- LVP flooring: $250
- Built-ins, wallpaper & desktop: $680
- Paint: $100
Total cost of the DIY shed build: $3,250
The biggest expenses came from the deck and hot tub installation. The hot tub sits about 75 feet from the house, so we had to dig a trench and run wire all the way out to power both the tub and the shed.
- Deck lumber: $1,200
- Hot tub electrical installation & supplies: $2,000
Total cost for the deck and hot tub installation: $3,200
Grand total (shed, deck, hot tub, furniture & accessories): $7,500

