Inspiration for our HUGE DIY Gravel Patio
Our 1950s home came with a spacious backyard full of potential—but it had clearly been neglected for years. We loved the mature trees, a rare find in city yards, but the landscaping (or lack thereof) left a lot to be desired. There was no grass for about eight feet beyond the back of the house, which meant a muddy mess every time it rained—especially for our dog. And then there was the tiny concrete patio, barely big enough to sit and enjoy the huge yard beyond it. We knew we needed a better outdoor space, so we set out to create a solution that was both functional and beautiful.
Challenges & Considerations
The biggest factors in planning this project were size, budget, and timeline. We wanted the patio to be large enough to truly enjoy the space, but we also needed to keep costs under $2,000 and complete it quickly—all without hiring professionals
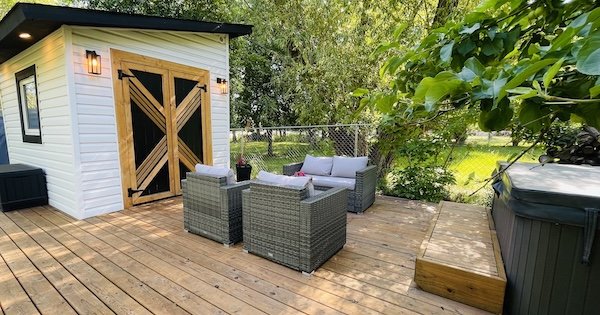
My husband's first choice was a large deck off the back of the house, and his second was an expansive paver patio. Both would have been expensive and time-consuming—more than I was willing to take on. Whatever we chose, I knew I wanted it to span the entire 30-foot length of the house to the garage. One thing was non-negotiable: the big oak tree was staying.
After some research, I came across gravel patios—and I was sold. We could do it for around $1,500 and finish it in a weekend. My husband wasn’t thrilled with the idea, but I was determined to make it work. In the end, he got his big deck projects a few years later, and I got my low-cost, low-maintenance patio.
Getting to Work
If you're in decent shape and you don't mind physical labour this might just be for you. We were pretty sore after the weekend but it was so worth it!

Materials For Our Budget Friendly Frame TV DIY
Amounts depend on how big you're going to make your loose material patio, path or walkway. The company we bought the rocks from delievered and dumped them in our driveway.
- Landscaping fabric
- Spray paint
- Black landscaping edge material to seperate the white rocks from the black
- Wheelbarrow for moving rocks
- Large Pales for moving rocks
- Shovels (we used spades)
- Edging Tool (my most used landscaping tool)
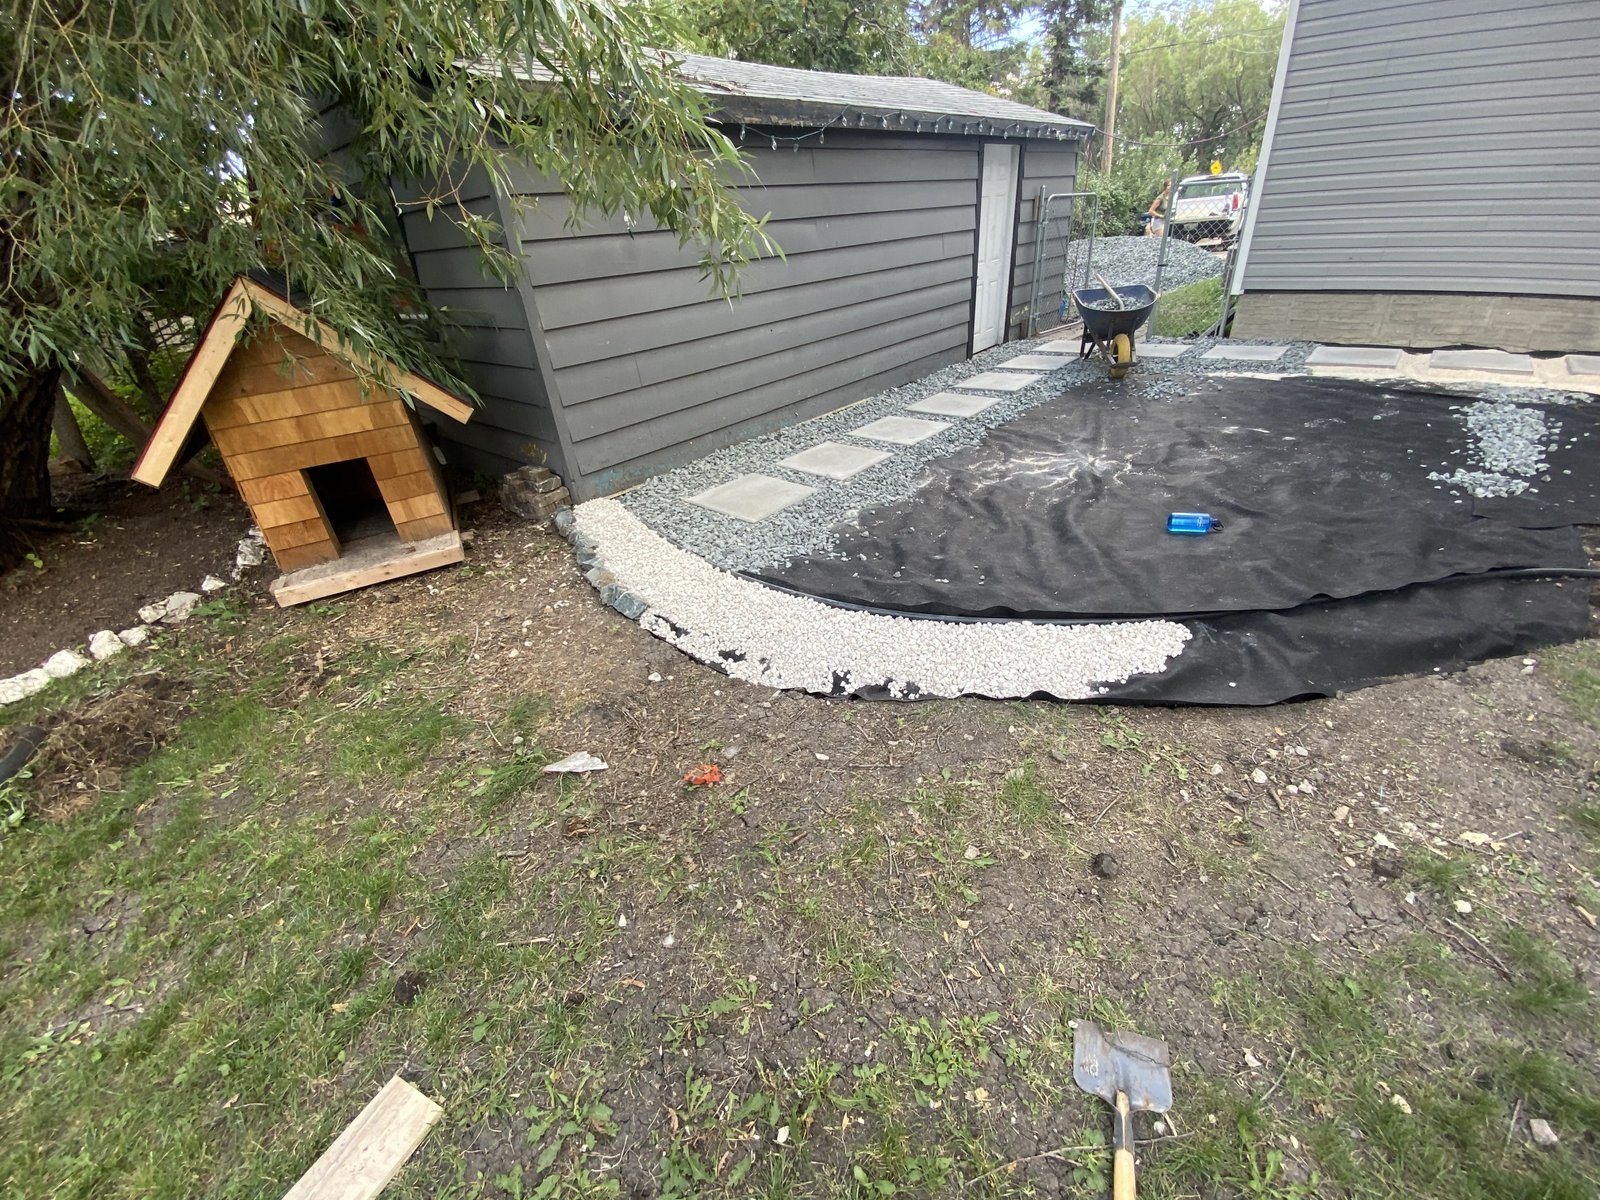
- Clean limestone - 3/4 inch - for the white border
- Black Granite - 1 1/2 inch (should've gone with smaller size rocks) - for the main patio area
- Large black granite rocks for the outermost border and around the house
- Large paving stones if you're creating a walkway in your patio
- Crushed stone for underneath the large paving stones to level your walkway


The Process
Step.1 Decide where and how big your patio is going to be and mark it out with sprayp paint
Step.2 Clear the area of any grass, weeds or old patio
Step.3 Edge around the border of the patio creating a ridge so the rocks don't just spill into the grass
Step.4 If you're doing a large paving stone walkway determine spacing for them and put down crushed stone under each one so the pavers are level
Step.6 Put your pavers on the level crushed stone
Step.5 Fill it all in with your gravel

What I like and What I Would Change
I love how the patio turned out—both aesthetically and functionally. It came together so quickly, solved our mud problem, and gave us two seating areas instead of one: a sunny spot and a shady retreat.
If I were to do anything differently, I’d use smaller black granite rocks for the main patio area. We chose the larger size for the look, but smaller ones would have been much easier to keep clean with a leaf blower. I also wouldn’t have ordered as many of the larger border rocks—leaves constantly get trapped in them around the house and garage, making cleanup a nightmare.
This patio is definitely not low maintenance. With trees all around, we constantly have leaves to blow off and sticks to pick up. Our dog runs through it, the lawnmower gets dragged over it, and the black and white rocks inevitably mix together. Plus, weeds still find a way to grow through.
Cost I can't remember exactly how much we spent on the patio but it was between $1500-$2000 Canadian (American's you can take at about $500 off my numbers). It was far less than a deck or a paver patio and MUCH quicker.
Is This the Right Project for You?
If you're working with a smaller budget but still want a spacious, attractive patio, and you're okay with some upkeep—like leaf blowing, weed pulling, and rock sorting—this could be the perfect solution for you! Personally, I find it quite peaceful to step outside in the morning and organize the white rocks with the white ones and the black ones back into the main patio.