The Inspiration for Our DIY Window Box
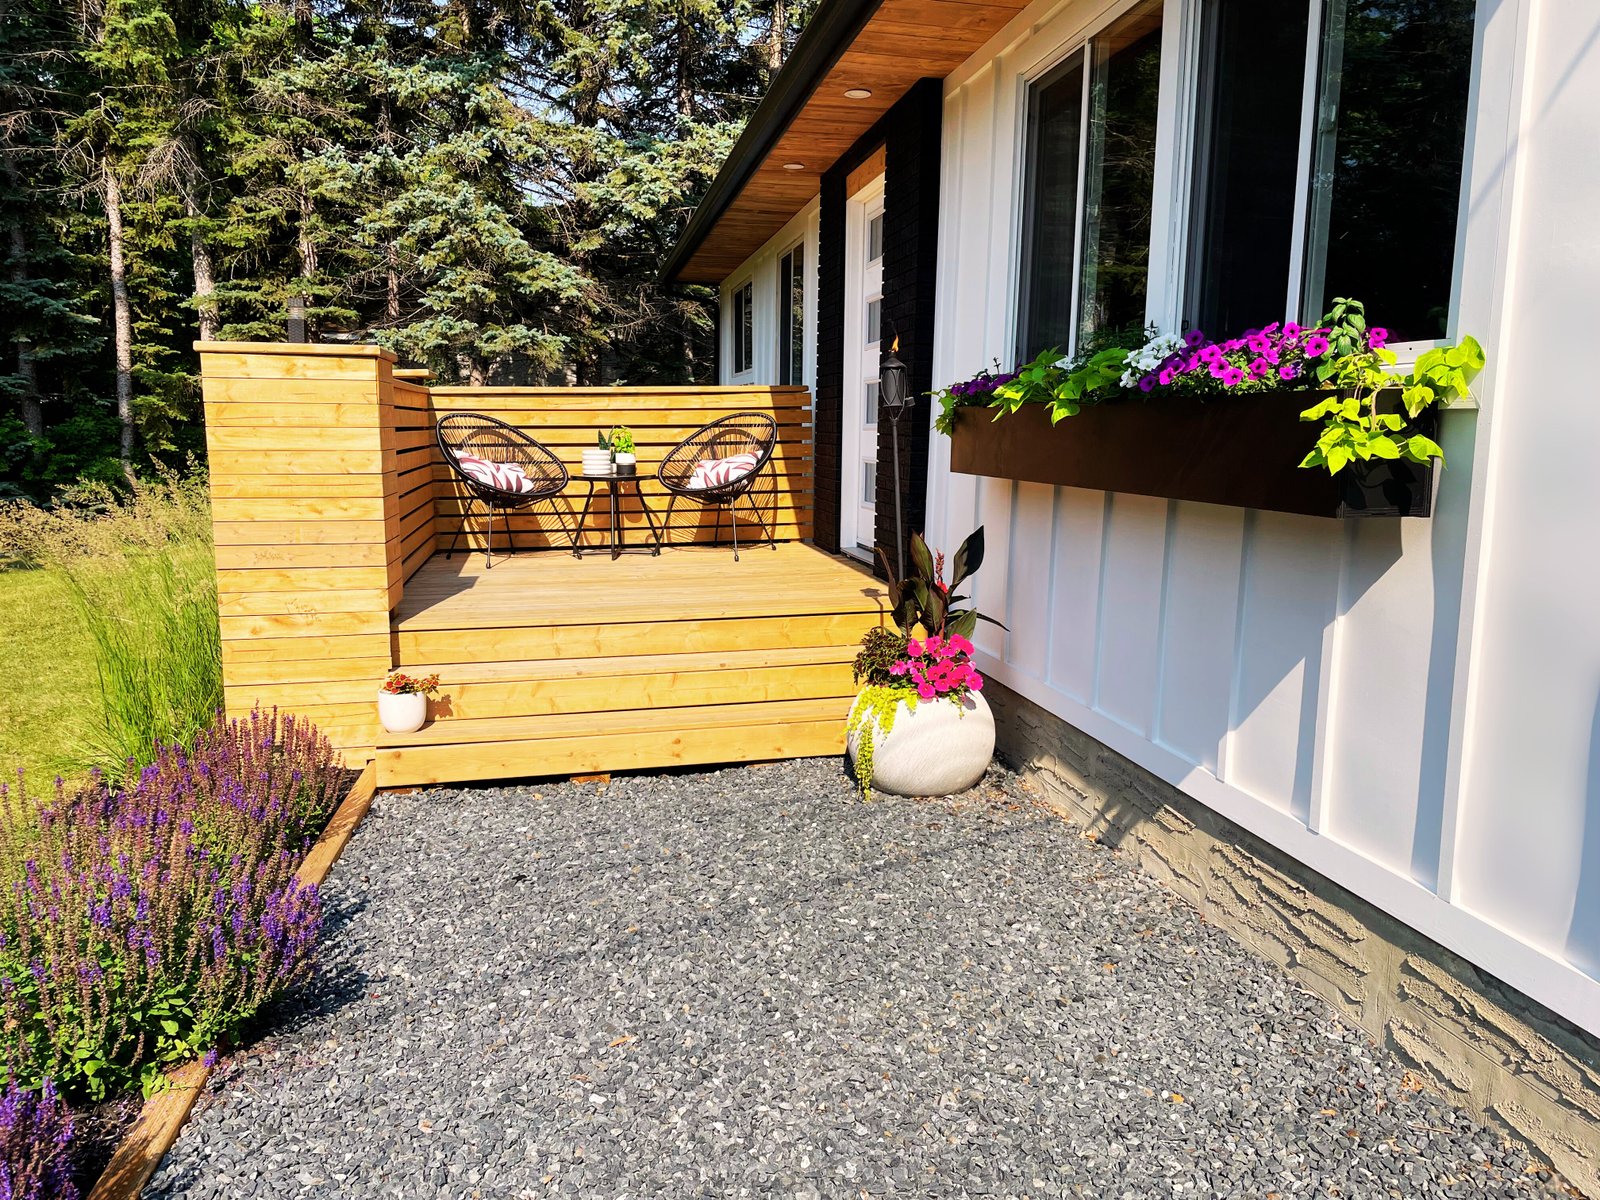
This is our second summer working on our front yard and the exterior of our home. Last year we replaced the broken concrete steps and walkway with a new wood deck and privacy screens, then covered the old driveway with black granite gravel to create a much larger, more modern-looking entry. We added hardy, low-maintenance salvias and ornamental grasses around the new walkway to bring in color and structure.
This summer, our focus shifted to redoing the house itself. The existing grey vinyl siding was poorly installed and falling apart, so we decided to install our own DIY board and batten siding to update the look without breaking the budget.
I considered replacing the windows with black-framed ones, but they’re only six years old and still in great shape—just not worth the cost. Painting the white PVC trim black wasn’t a great option either since it can cause warping in full sun and would’ve been a lot of work for a questionable payoff.
I’d seen other homes with white board and batten paired with black trim, but with white windows like ours, it just didn’t look quite right. I decided to keep the windows and trim white but knew I needed something black to break up the expanse of white on that wall.
That’s when I started searching Pinterest for modern DIY window boxes. I came across a photo of the black window boxes at Magnolia Table (Chip and Joanna Gaines’ restaurant) and knew that clean, modern look would work perfectly. Their version is metal—and expensive—so we decided to build a similar style out of wood for a fraction of the cost.
Building & Mounting a Modern DIY Window Box
This was definitely one of our easier projects—it only took a couple of days to complete. I wanted clean lines, so the design was just a simple rectangle. I originally planned for the box to span the entire width of the front window, but the window was a few inches wider than a sheet of plywood. To keep things simple and on budget, we scaled it down slightly.
We didn’t want the box to stick out too far into the walkway, so we made it 9 inches tall and 7 inches deep. We figured that out just by standing in front of the window with a measuring tape and visualizing how far down and out the box would sit.
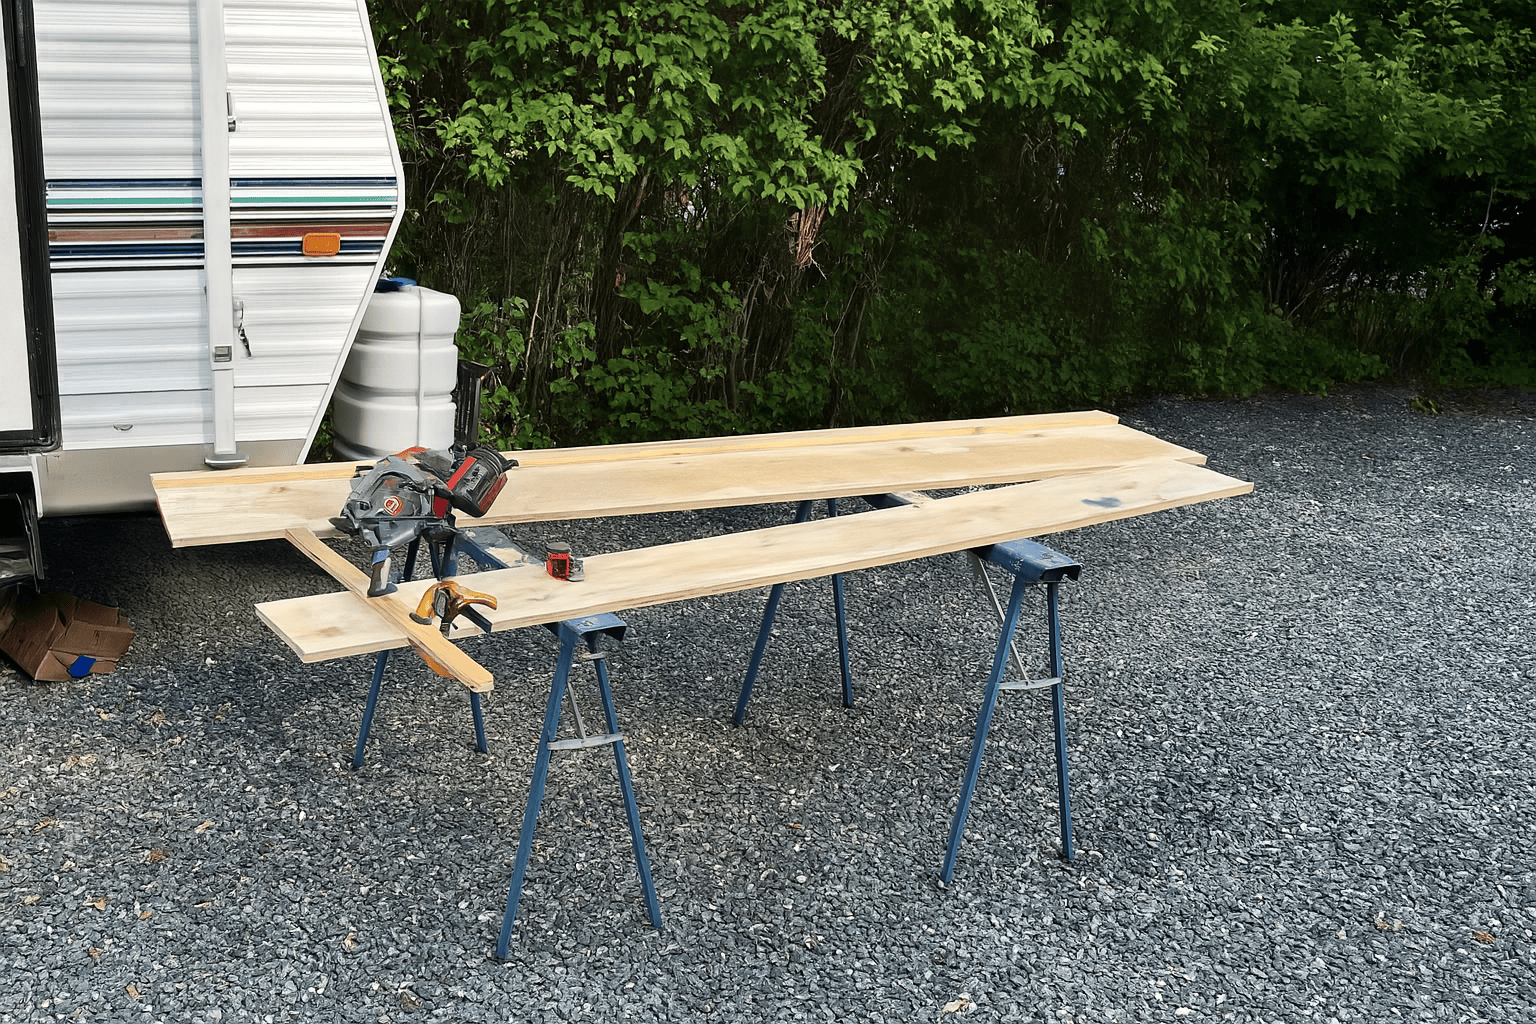
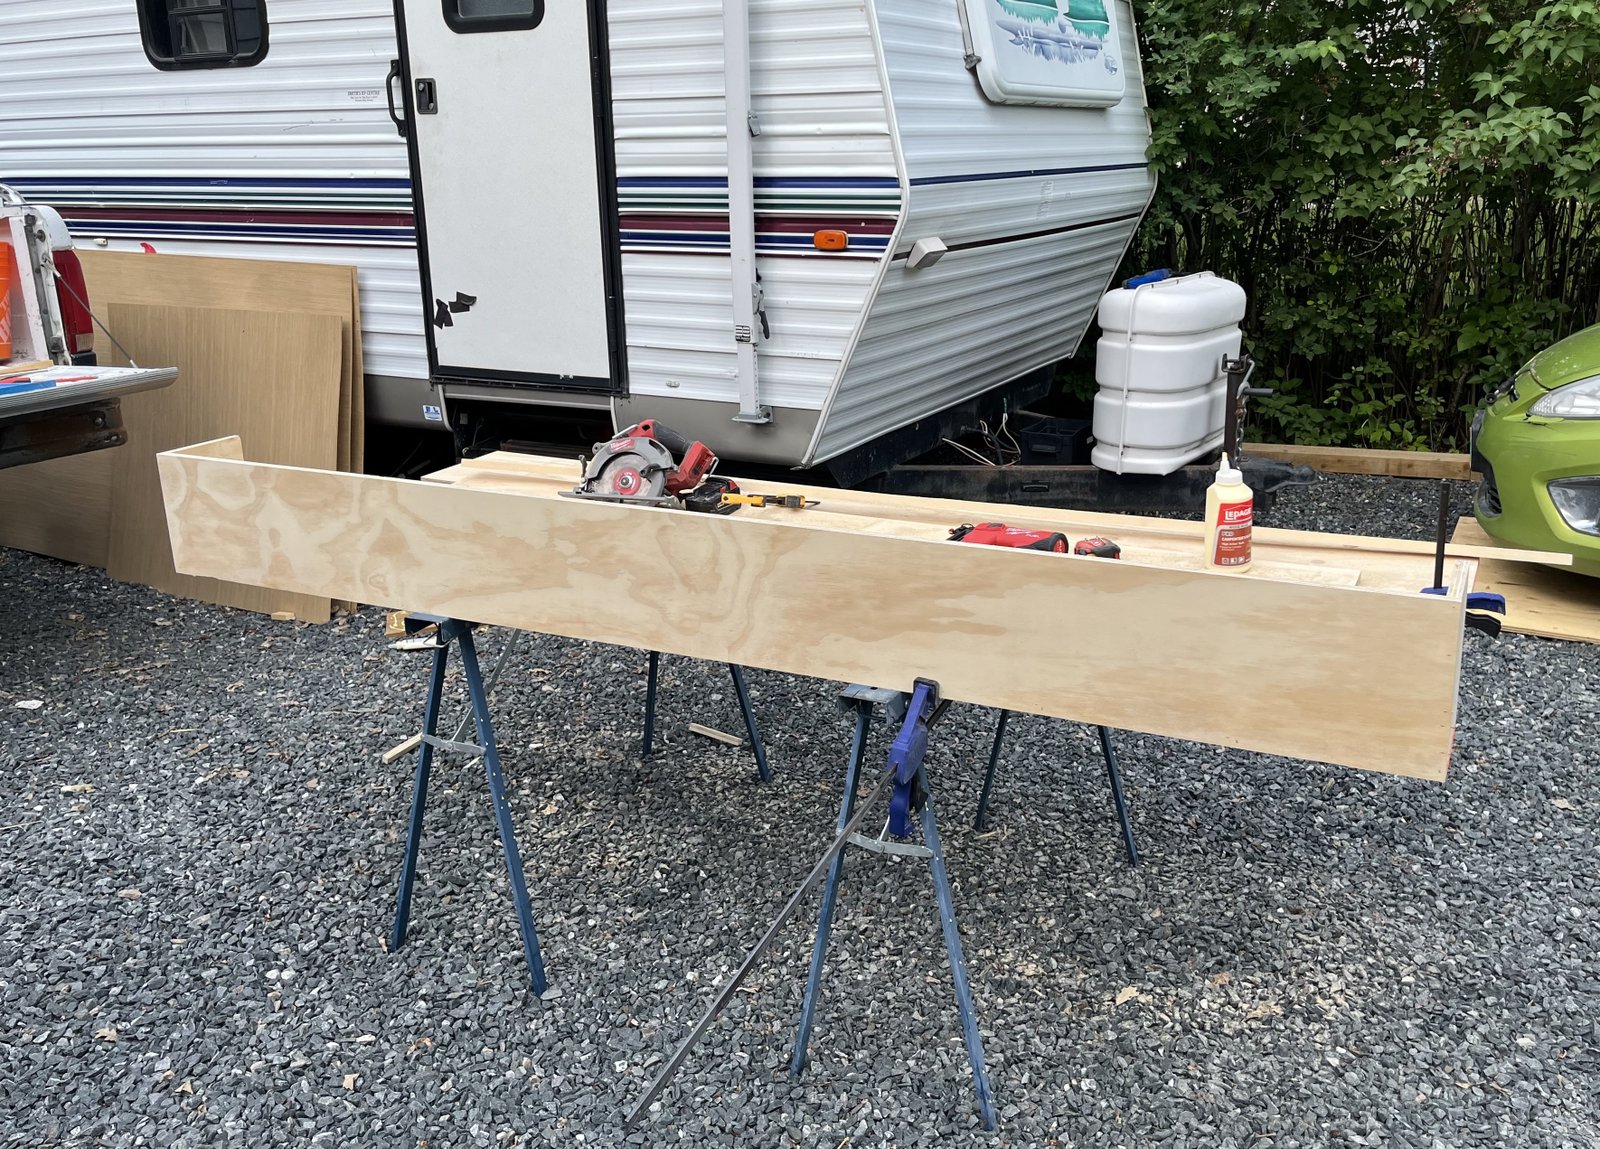
To build it, my husband used his table saw to cut the plywood into five pieces: front, back, bottom, and two sides. (You could use a circular saw instead if you don’t have a table saw.) He assembled the pieces using wood glue and brad nails, clamping each section as the glue dried before moving on to the next one.
Once the box was assembled, it was my turn to paint. We had some leftover black exterior paint from when I painted the bricks on the front of the house a few weeks earlier. We talked about lining the inside with plastic but decided to skip it—I just painted both the inside and outside. We agreed that if it rots in ten years, we’re fine with building a new one.
To mount the box to the wall, my husband used eight lag bolts spaced evenly in two rows across the inside of the box. He also drilled drainage holes in the bottom to prevent water buildup.
Materials:
- 1 sheet of plywood
- Wood glue
- Brad nailer and nails
- Table saw or circular saw
- Clamps
- Lag bolts
- Exterior paint
- Plastic liner (optional)
- Drill
Filling the Box: Plants We Chose & Why
Once the window box was mounted, it was finally time for the fun part—plants! I had a list in mind and was so excited to go pick everything up. But when we got to the first garden center (the same one I bought the flowers for the planter below the box), they were completely out of annuals. I figured it was just that location, so we drove to a bigger garden center... same thing. Apparently, if you don’t plant your annuals by early to mid-June, you’re out of luck.
Eventually, I tried Home Depot. While they didn’t have exactly what I wanted, they had enough to fill the box and get the look I was going for.
Here’s what I used in the window box:
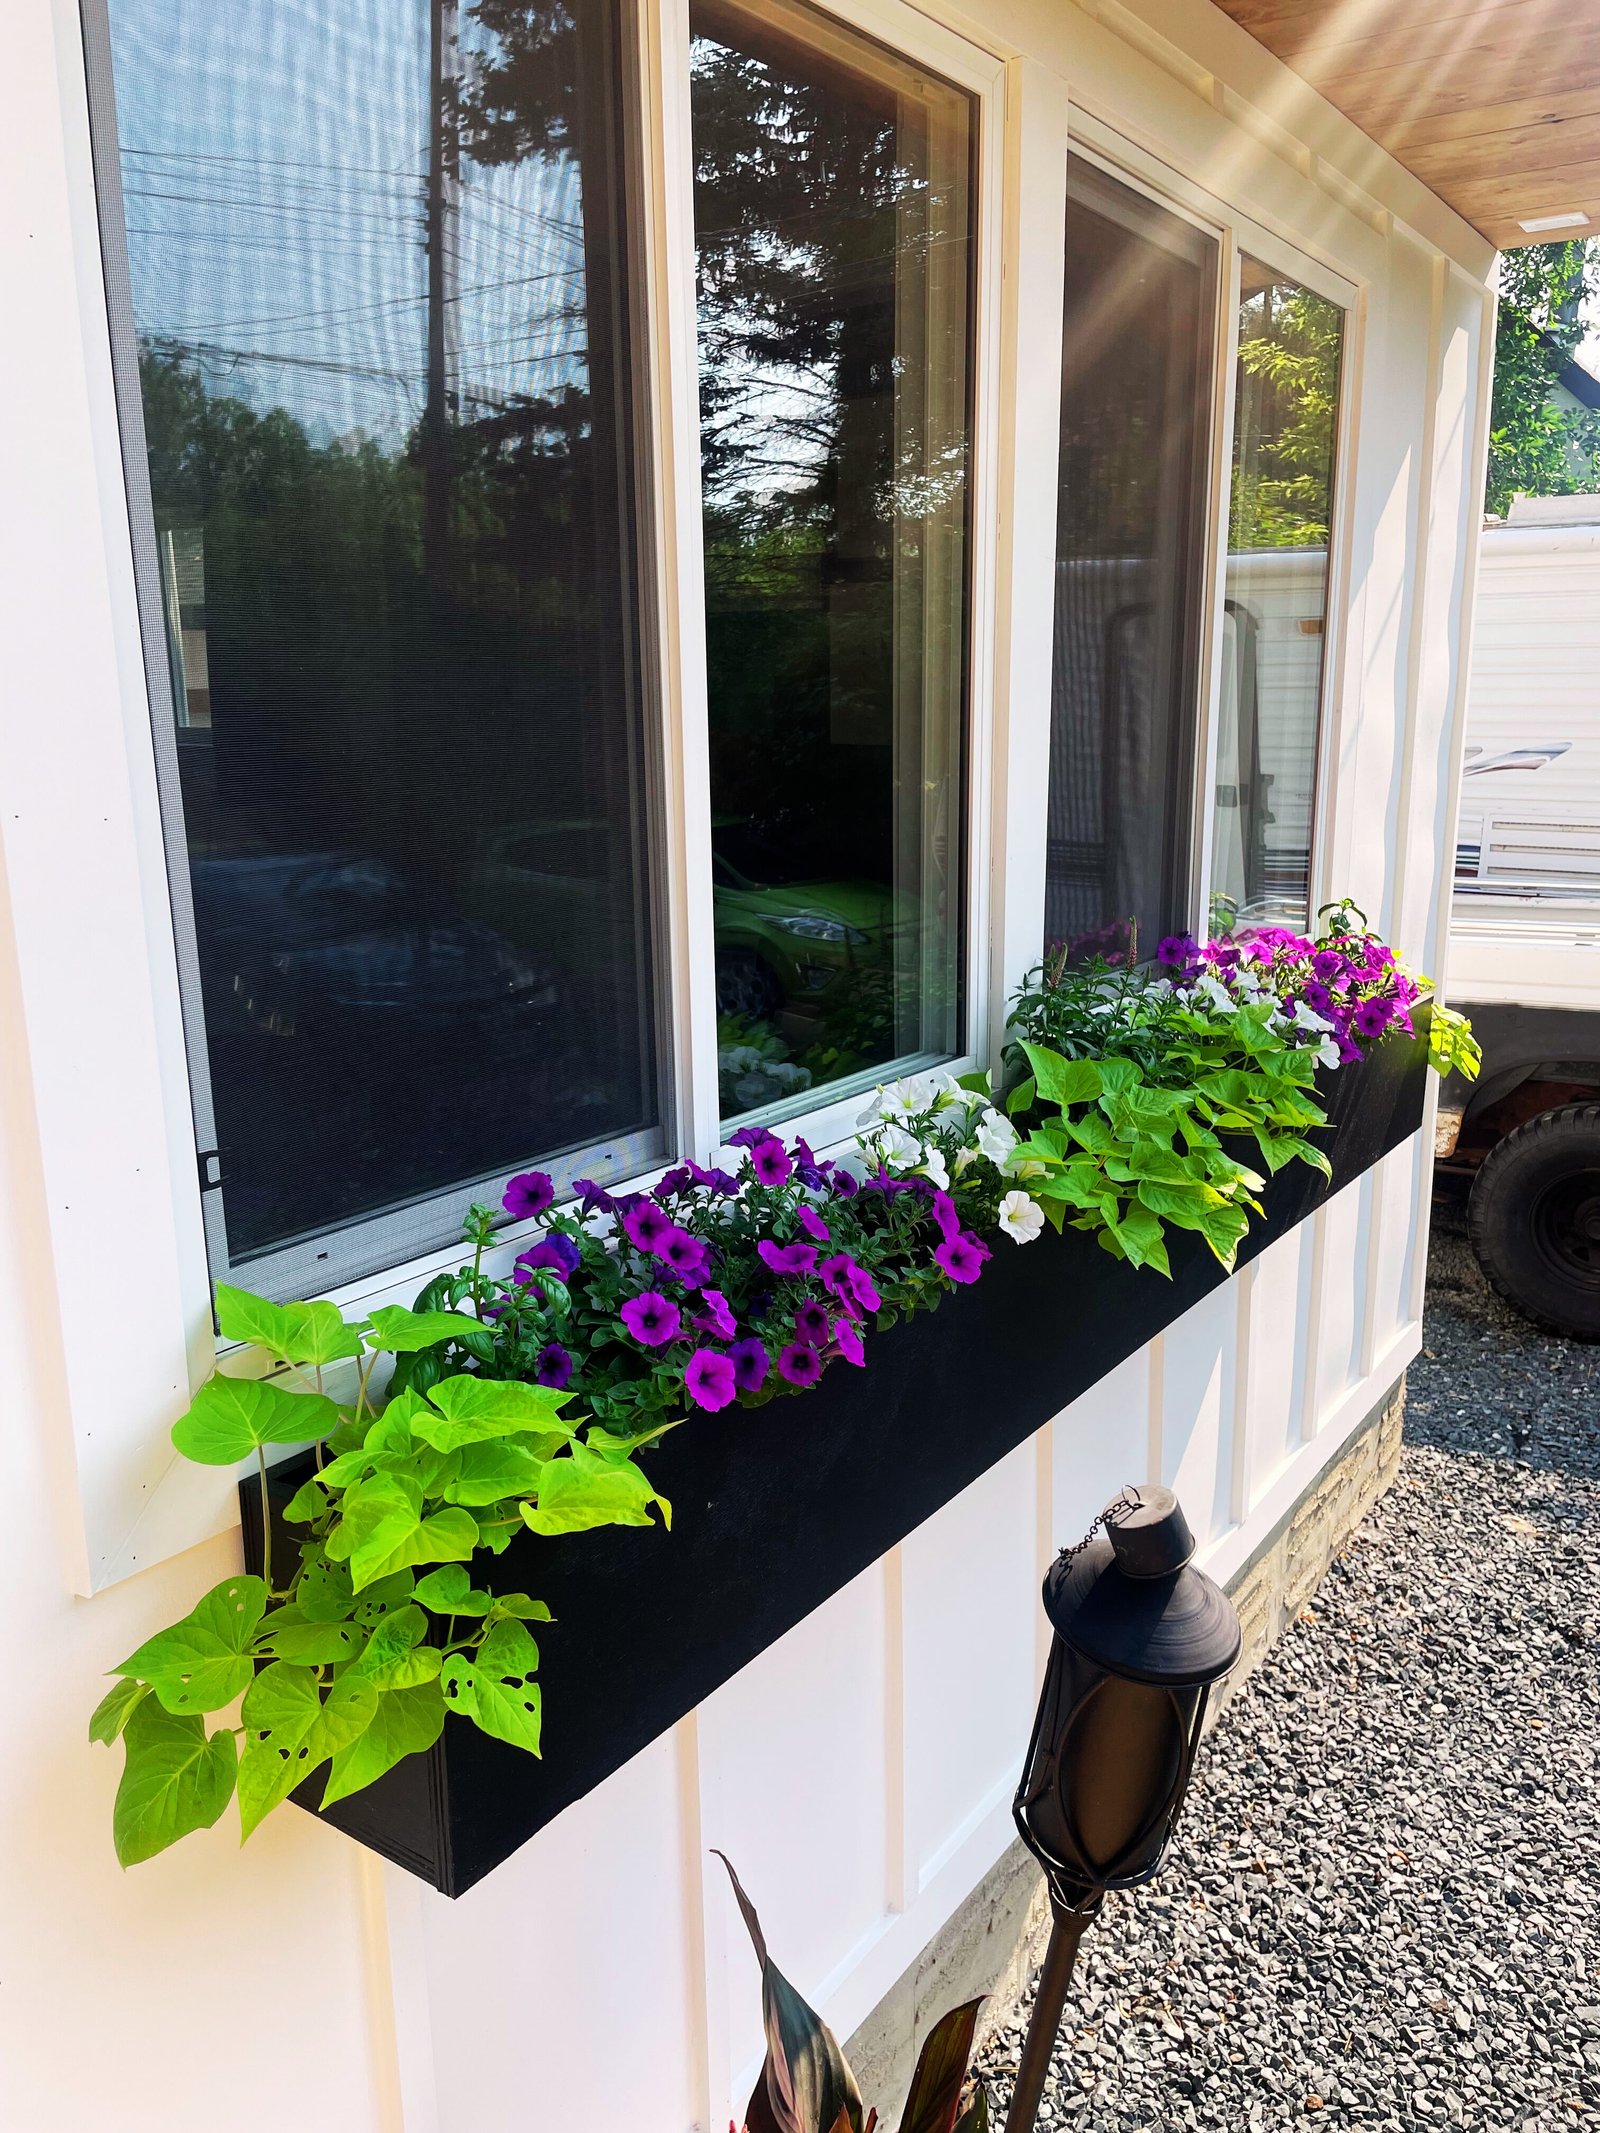
- 4 purple petunias
- 2 white petunias
- 2 basil plants
- 4 sweet potato vines
- 1 pink spike speedwell (it was on clearance for $5, and I figured it might come back next year!)
- 2 bags of garden soil
I originally wanted potting soil, but the bags were all stored out in the parking lot and I just grabbed what the cashier recommended. At that point, my 4-year-old was climbing the mulch stacks, and I just needed to get out of there. Note to self: don’t buy that soil again—it reeked like compost or manure and smelled awful for two straight weeks.
I didn’t follow the spacing guidelines—I packed the plants in fairly close together because I wanted it to look full right away and overflowing in a few weeks. Honestly, if you’ve ever looked at the premade planters garden centers sell, you’ll know they’re not sticking to spacing rules either.
Cost Breakdown
We were able to keep the cost of this DIY window box pretty low because we already had all the tools, wood glue, paint, and lag bolts on hand. If you need to buy the glue and paint or rent tools, expect the total to increase by about $150. That said, if you plan on doing endless DIY projects like we do, investing in tools is well worth it.
Material Cost Breakdown
- 1 sheet of plywood (we went with the good stuff) – $100
- Plants & soil – $100
- Lag bolts – $10
- Can of exterior paint – $75
- Wood glue – $6
Total cost: $291
Final Thoughts
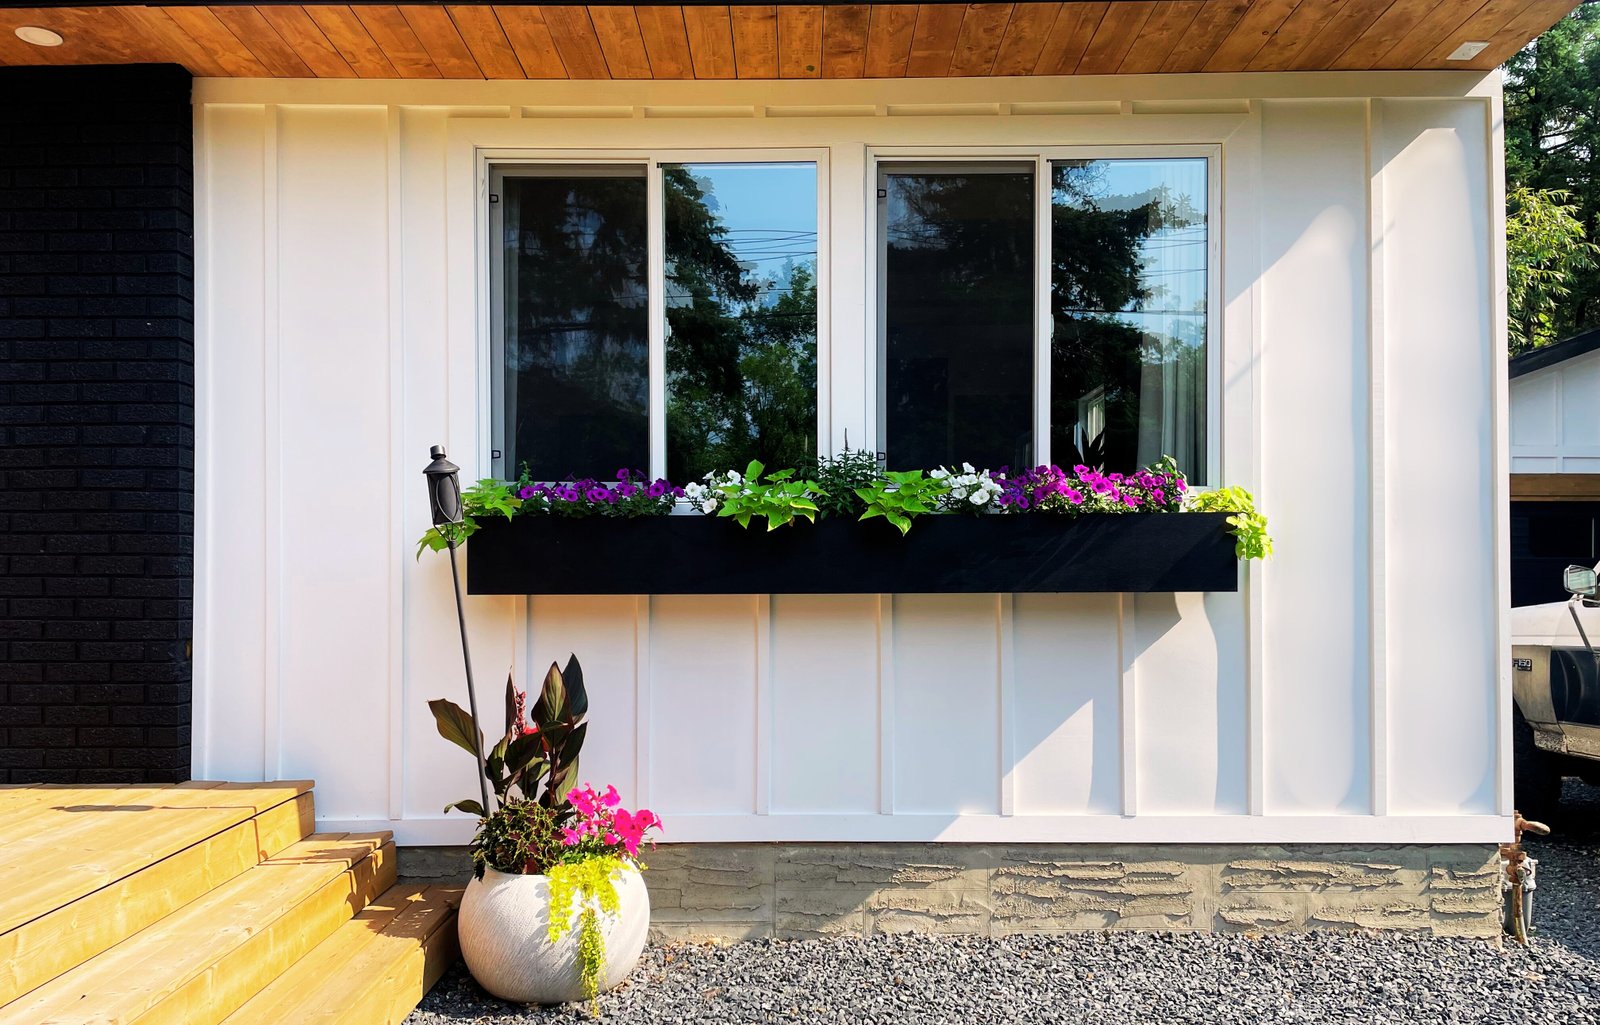
I couldn’t be happier with how this project turned out—it was quick, easy, stayed on budget, and made a huge visual impact. The window box completely changed the look of the front of our home. It breaks up all the white, adds just the right amount of contrast, and makes the walkway and deck feel much more inviting.
One of my favorite things about the window box is that I get to enjoy the flowers from inside the house, too. I love having fresh flowers, but I’m way too cheap to buy them regularly—so this feels like having a vase of flowers in my living room all summer long.
Even from the street, the difference is noticeable—we’ve had multiple people walking by stop to compliment it. For such a simple project, it really brought the whole exterior together and gave the house that extra bit of curb appeal we were looking for.

