Inspiration for Our Open Concept Entryway Makeover
Before we took possession of our house, we had planned to build a half-wall between the entryway and the living room. It was going to include a built-in storage bench, cubbies for winter clothes and accessories, and low hooks for small children to hang coats and backpacks. When we first toured the house, we really liked it, but we hated that there was no real entryway—it felt like you were just stepping straight into the living room. Because, well… you were.
Why Was The Entryway In Such Need of A Makeover?
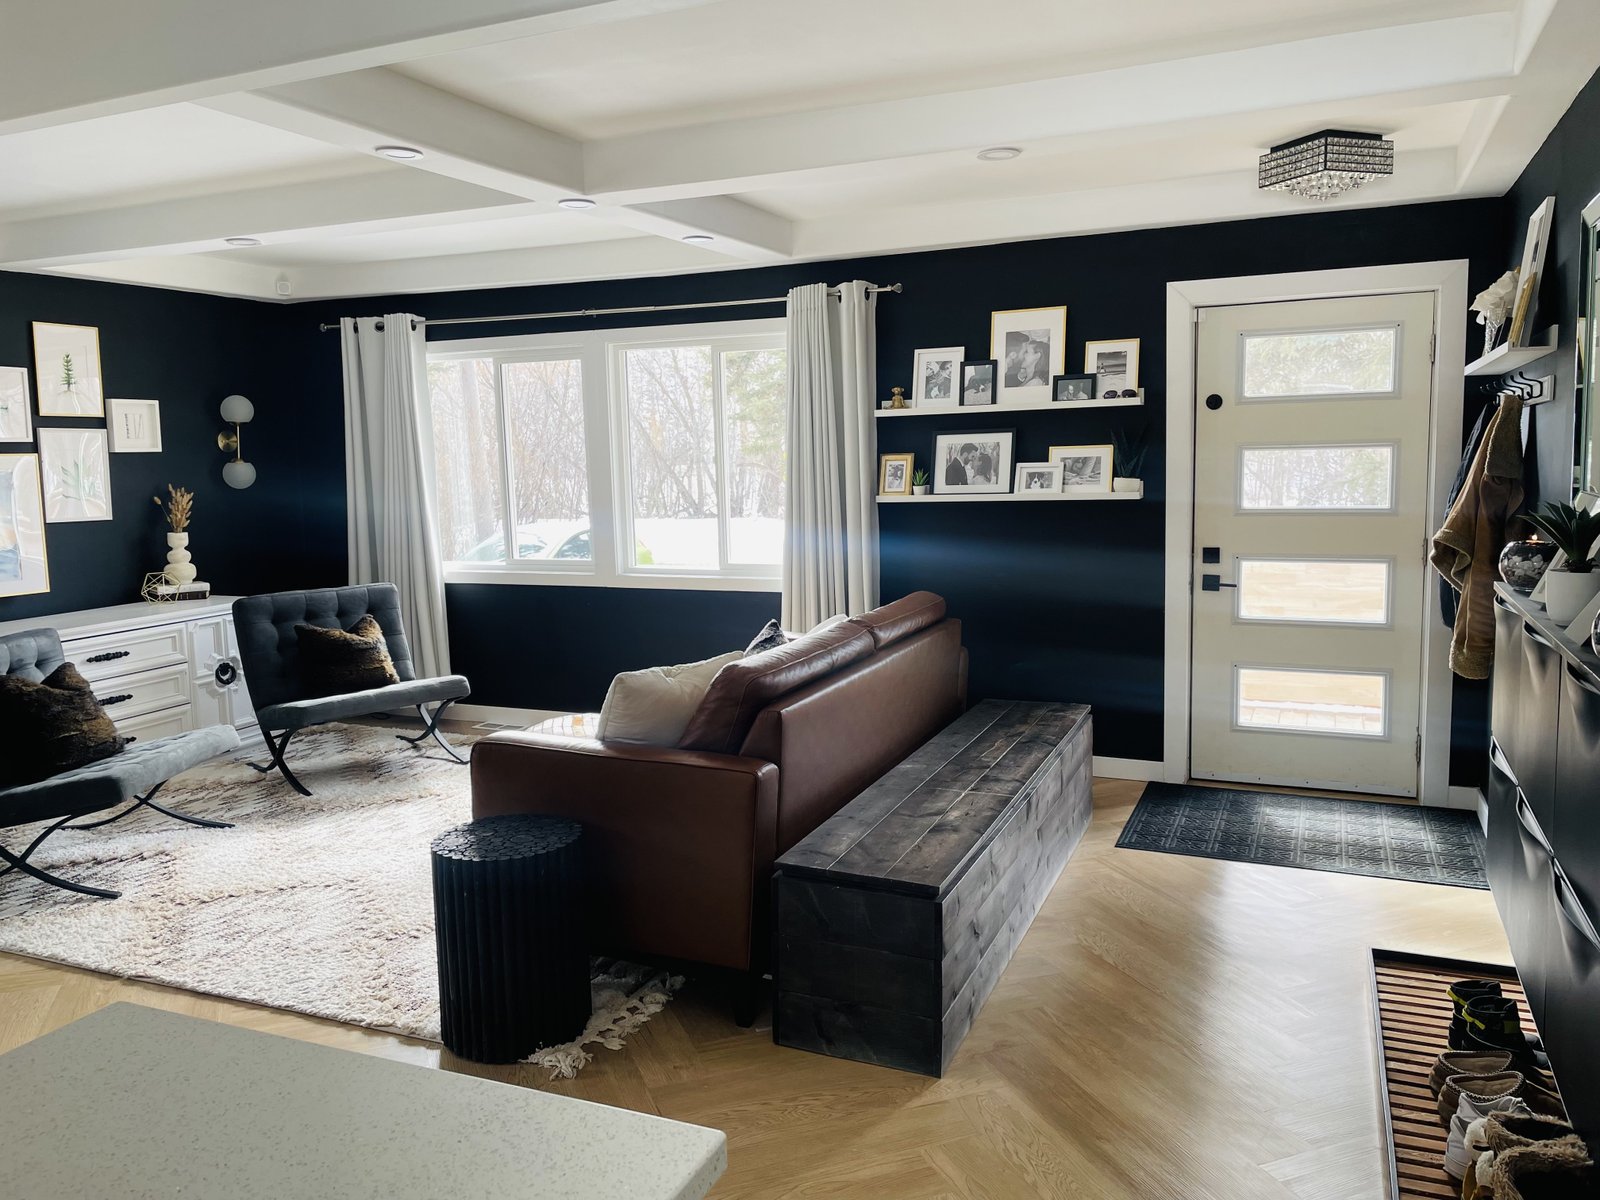
The entryway wasn’t just non-functional—it didn’t even feel like a defined space. It seemed like the previous owners had tried to maximize the living room by shrinking the entryway as much as possible. There was no rug, no storage, and nowhere to put coats or boots—except the couch.
On move-in day, I finally figured out where they kept their coats. They had gutted the small pantry off the kitchen and jammed a steel pipe inside as a makeshift closet! That wasn’t going to work for me—I needed a real entryway. Here’s how we transformed the space into something both beautiful and functional.

Our Solution to Making the Entryway Functional
Of course, we wanted an inviting and beautiful entryway, but before we could focus on aesthetics, we needed to make sure it was functional!
Maximizing Space: The first step was making the entryway feel bigger. We moved the couch in by about two feet to create room for our long DIY storage bench, which serves as both a place to sit and tie your shoes and much-needed hidden storage for small appliances, groceries, and our ridiculously large collection of reusable bags.
Practical Flooring: A mat was a must. As much as I would have loved a more stylish rug, it wouldn’t have lasted through two winters. We opted for a durable mat that could handle snow, slush, and daily wear.
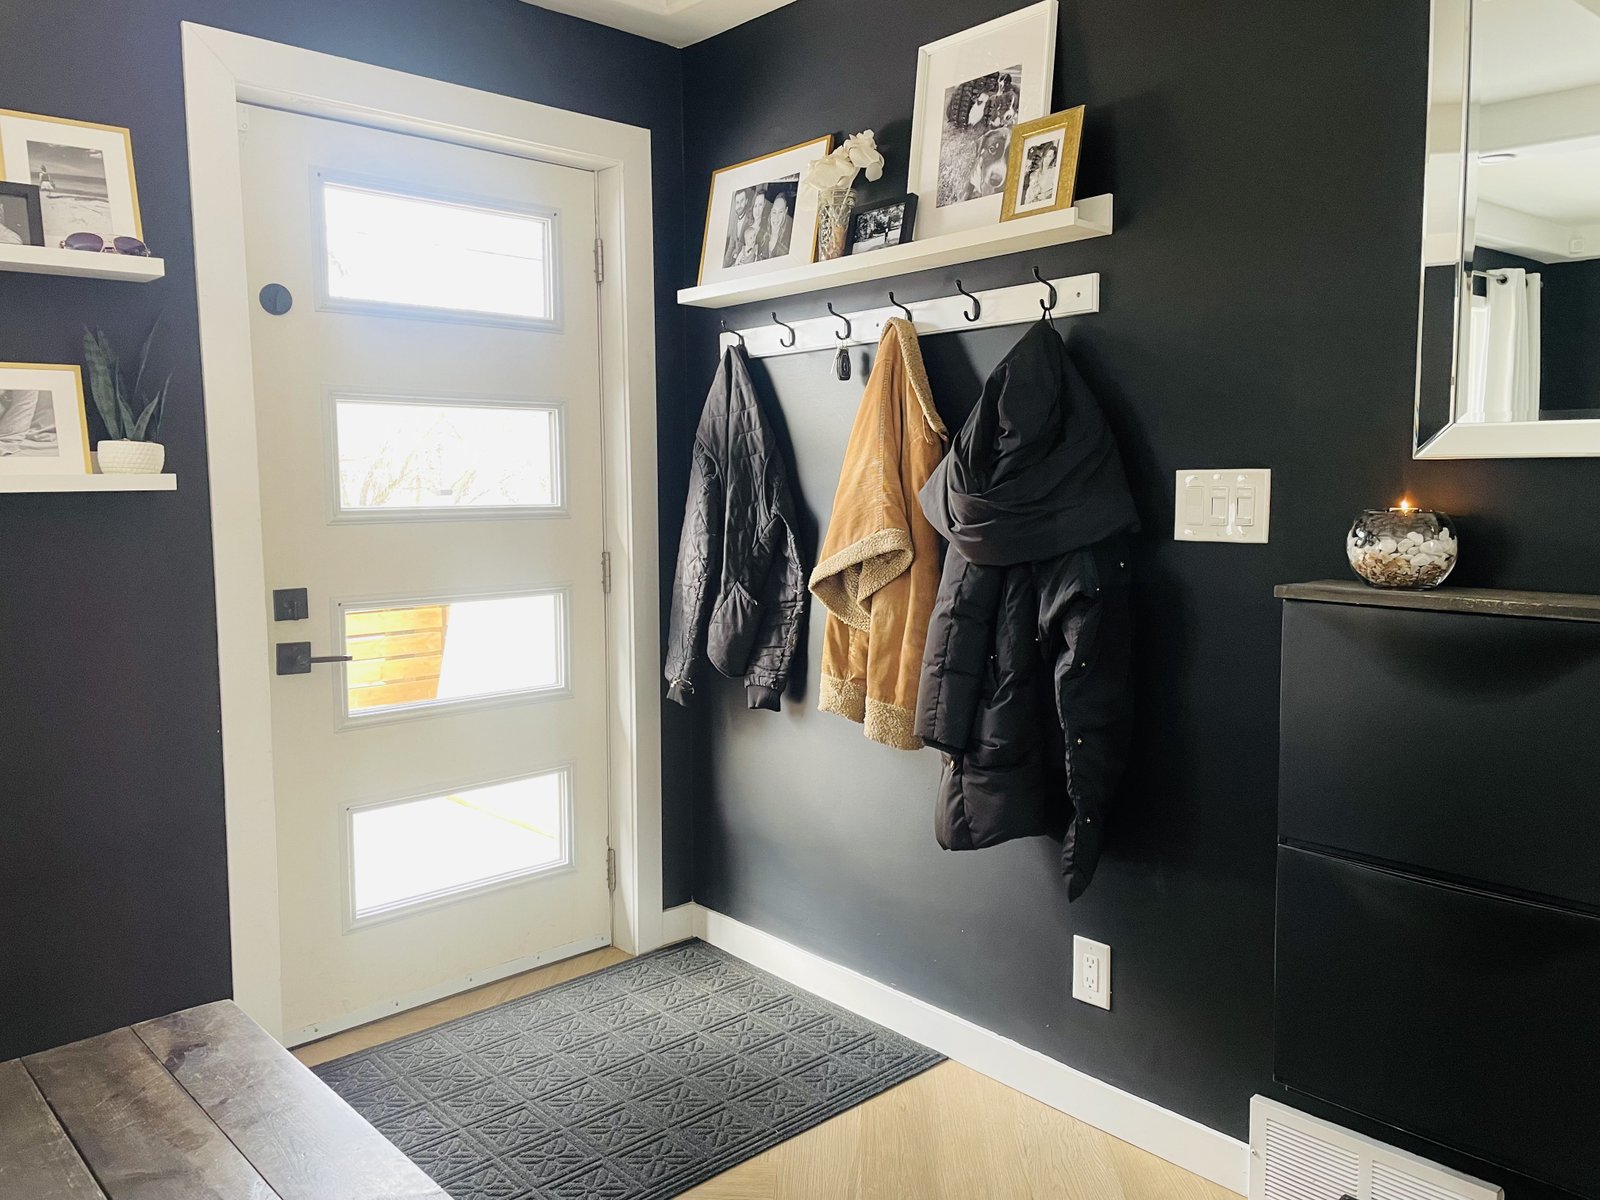
Hooks for Everyday Use: By the second day in the house, we knew we needed hooks—fast! Adding sturdy hooks gave us a quick and easy way to hang coats, bags, and other essentials right by the door.
Closed Storage for Clutter Control: To keep things organized, we installed as many IKEA Trones units as possible to hide smaller winter gear, summer shoes, and any other clutter. I originally wanted eight Trones (two rows of four), but due to the placement of the electrical switches, we were only able to fit six.
Boot Tray for Snowy Months: Since we deal with about six months of snow, we needed plenty of space for boots to dry. The length of three Trones units determined the size of our DIY boot tray, giving us a designated spot for wet and muddy footwear.

Adding Some Style to the Entryway
With the functional aspects of the entryway taken care of, it was time to focus on making it look good and ensuring it flowed with the rest of our open-concept space.
Incorporating the Coat Hooks: The hooks looked a little bare and out of place at first, so I added an IKEA picture ledge above them to create a visual connection with the picture ledges beside the door. I styled it the same way, using black and white family photos in black, white, and gold frames, along with some white paper flowers I had made for our wedding. I've done an entire post on how to style a picture ledge here.
Elevating the IKEA Trones: Trones units are incredibly functional, but on their own, they don’t exactly scream style. A simple solution was adding a wooden shelf on top, which made a huge difference! To further enhance the look, I added two mirrors from JYSK ($50 each). After experimenting with different arrangements, I found that a symmetrical setup worked best: two DIY candle holders on the outer edges, two evenly spaced family photos in the center, and a decorative plant as the focal point.
A Custom DIY Boot Tray: Most boot trays are just basic black rubber mats, but I wanted something more stylish. I had seen boot trays on Pinterest that used rocks in the bottom, allowing melted snow to drain. We made our own version using a plywood base with 3 1/2" black-painted trim for the sides. The black and white rocks worked well for a while, but they weren’t easy to clean, especially with all the sand and salt used here in the winter. To fix this, we added wooden slats on top of the rocks for easier maintenance and stained them to match our sofa, adding a touch of warmth.
Tying It All Together: In an open-concept space, you don’t have to use the same colors everywhere, but sticking to a cohesive palette helps everything flow. We kept it simple in the entryway by using black, white, gold, warm wood tones, and pops of green with decorative plants.

Final Thoughts...
I love our entryway—it’s super functional, looks great, and blends seamlessly with the rest of our open-concept living space while still feeling like its own defined area.
Cost: You can easily transform your open-concept entryway for under $500. The IKEA Trones come in sets of two for $50, coat hooks cost $35 or less, and the mirrors were $100. Frames, decor, and shelf materials added about $100, and while I don’t have the exact cost of the storage bench, we built it using inexpensive fence boards for under $100.


