How I Styled Our White Ikea Picture Ledges
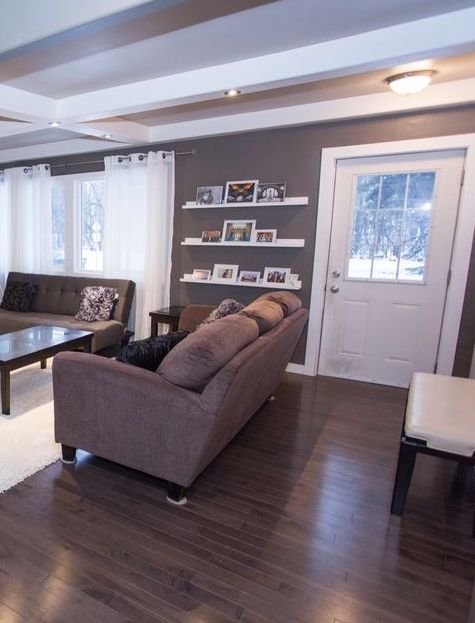
These white IKEA picture ledges were already in the house when we moved in. At first, we kept them more out of convenience than design—we didn’t feel like filling holes and repainting the walls. But getting them to look right took some trial and error. I experimented with different IKEA frames, rearranging them until I found a layout that felt balanced and intentional.
Once I finally got them styled the way I liked, I was so glad I decided to keep them rather than take them down. Picture ledges are an easy, budget-friendly way to personalize your space and display your favorite family photos. My daughter is almost 17 now, and as she gets older, those pictures of her as a little kid have become even more precious to me—I love seeing them every day.
In this post, I’ll cover the best places to use picture ledges, general styling tips, and the exact frames I used—plus a cost breakdown.

Why Picture Ledges Work In Almost Any Space
Since a well-styled picture ledge can work in almost any space, let’s start with where they don’t work so well—the kitchen, bathroom, and tight hallways. You often see them behind sofas in living rooms, and they can look great in kids' rooms, too. We actually used three smaller ones at a lower height so our son could access and display his own books. They also work well above a desk in an office, in a spacious hallway, or even in an entryway like ours.
Before we moved in—and for a while after—we actually had three picture ledges in our entryway, as shown in the before image. But after seeing my son run through that narrow space one too many times, barely missing his head on the corner, I decided to take one down in hopes of avoiding an ER visit and some stitches.
I love my gallery wall around our hidden DIY Frame TV—you can check that project out here! But picture ledges are much easier to set up and adjust until they feel just right. If you’re into seasonal decorating, you can also swap out a few pictures to match your new decor effortlessly. Plus, they require far fewer holes in the wall, which is especially helpful if you're renting.
Tips for Styling a Picture Ledge
Vary frame sizes to create dimension and visual interest. I also recommend mixing portrait and landscape orientations rather than using all frames in the same direction.
Layer frames instead of lining them up to give your picture ledge a more relaxed, designer look.
Mix in decor items like books, vases, or small sculptures to add texture and variety.
Stick to a cohesive color scheme for a polished feel. I chose black and white family photos but added variety by using black, white, and warm gold frames.
Leave breathing room—don’t overcrowd the shelf. I’ll admit, I’m a little guilty of this one! When we removed the bottom shelf, I struggled to part with some of the pictures.

My Exact Picture Ledge Setup
The picture ledges, along with all the frames I used, are from IKEA. They’re affordable and not custom, but they still look great! Good design can make budget materials look high-end, and even the most expensive pieces still rely on strong design to truly shine.
Picture frames are listed 1-9 going top to bottom from left to right. For my American friends you can take at least 30% off of these prices.
- 1. RODALM 4" x 10" frame in white - $4.99
- 2. FRISKBO 5" x 7" frame in black - $2.99
- 3. LOMVIKEN 12" x 16" frame in gold - $14.99
- 4. RODALM 4" x 6" frame in black - $2.99
- 5. LOMVIKEN 8" x 10" frame in gold - $6.99
- 6. SILVERHOJDEN 5" x 7" frame in gold - $6.99
- 7. RODALM 12" x 16" frame in black - $12.99
- 8. RODALM 5" x 7" frame in white - $3.99
- 5. LOMVIKEN 8" x 10" frame in gold - $6.99
- 45.5" MOSSLANDA picture ledges in white - $14.99 Each
Cost Breakdown For My Styled Ikea Picture Ledges
Minus the cost of prints and any decorative items like vases or plants, this entire picture ledge setup cost just $94. I simply selected some of my favorite family and pet photos from my phone, added a black and white filter, and sent them off to Walmart for printing. If you're willing to wait a day, the prints are very affordable.
This type of styling is an easy and affordable way to display your favorite photos or artwork—especially when compared to the cost and effort of a full gallery wall or built-in shelving. Picture ledges offer the flexibility to switch out prints and decor with the seasons or as your style evolves, making them a great long-term solution for personalizing your space without a big commitment.
Final Thoughts
If you have a bare wall in your home, I’d encourage you to try a picture ledge—or even two or three, depending on the space. It’s an easy way to add style and personality without a big commitment. You can use mine as inspiration or copy the entire setup and get it done quickly for under $100!

